Spice and Happiness With Demitri’s

There are a few things that I know-

  1. There’s nothing better than a sunny day in Seattle
  2. Happiness is a house full of friends gathering to cook, drink and chat while a herd of small children occupy themselves.
  3. A Bloody Mary and Margarita bar makes the first two things, well, even more perfect.

Recently, I had this trifecta come together perfectly when I gathered a few of my chef friends together. Our kids were antsy from all the rain and being cooped up indoors for way longer than any parent can handle. We had been craving a chance to get together with the need to celebrate the sunshine with a good cocktail (or two). I sent the solution in text form: “Come over to my house. Margaritas, Bloody Mary’s and steak tacos. I’ve got you covered”.

Like a moth to a flame (or an over tired parent to a chance at a break), my friends flocked. We laughed, as we ate salsa and guac – “Do you remember the days we used to hit Capitol Hill, and get a proper drink?” We all nodded, recalling our days at any of the local dive bars, before kids, long hours and the gentrification of our favorite haunts changed our social calendars. We paused, and before any of us could get out a grumble or mutter something that made us sound like one of our parents, I came to the rescue. Well, me and Demitri’s, and I started mixing up a storm.

Who is this Demitri’s and why should you stop what you’re doing and seek them out?  Demitri’s is a Seattle based purveyor of gourmet cocktail mixers founded by Demitri Pallis, who like most of us, was tired of inconsistent cocktails, so much so that he started making his own mixers. That’s right folks – when you can’t get what you want, you do it yourself. What started as a need 30 years ago, turned into a hail mary for those of us who just want a good cocktail without leaving home.

Why else? They aren’t just local, but actually in my neighborhood – I see them hiring my neighbors. That kind of community approach is important to me. Plus, they use ingredients I can actual pronounce, with organic options and for those of you in the need – there’s gluten-free options, too. Also, since I can never commit to one flavor of anything, they have me covered with a variety of mixers like original, chilies & peppers, extra horseradish, and chipotle habanero. Still not convinced? Two words: Pepperoni. Straws. YES – a meat straw, It’s perfect! Lastly, you can find them almost everywhere, and if you can’t locate them close by, Amazon carries them too!

mixer

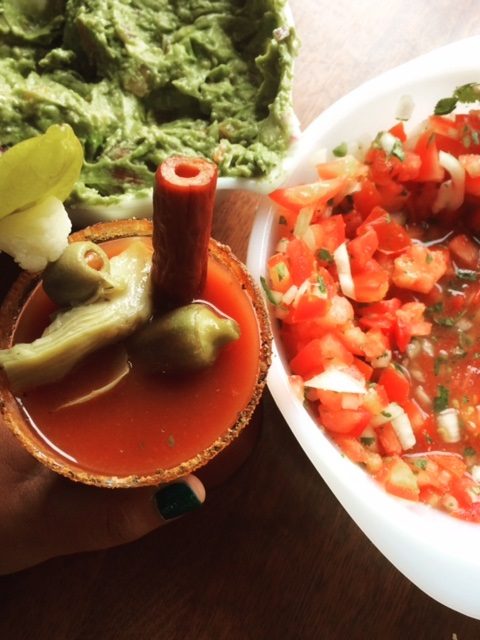
I put together my garnish skewers in advance – combining olives, pepperoncini’s, pickled cauliflower, and pickled okra. I’ve added blocks of cheese in between the pickles – it’s up to you, although a cube of blue cheese goes SO well with the extra horseradish mixer.  I also coated my glasses in advance with Bacon Salt Rimshot – their rim salt, to cut down the amount of waiting we’d need before enjoying.

pickled vegetables


Momma’s Bloody Mary
We made ours to order, so this recipe makes 1

8 ounces tomato or vegetable juice
1 teaspoon Demitri’s mixer (more if you like a stronger flavor)
1-2 ounces vodka (or an equal amount of tequila for a Bloody Maria)
Juice of a quarter of a lime
A few cubes of ice

The key to this is make sure your ingredients are all chilled in advance, there’s nothing worse than a warm cocktail. Mix all ingredients up, and pour into your glass, add in the pepperoni straw and your garnish. Stir, sip, nibble. It’s super simple!

cocktail guacamole salsa bloody mary

Since I know that once the Mary’s are gone, you’ll need something a little sweet, I have you covered there too.

Tangerine Dream Margaritas
Makes 4

2 cups fresh squeezed tangerine juice (approximately 8 tangerines)
6-8 ounces tequila
16 ounces of Demitri’s Organic Traditional Margarita Mixer
Juice of 2 limes
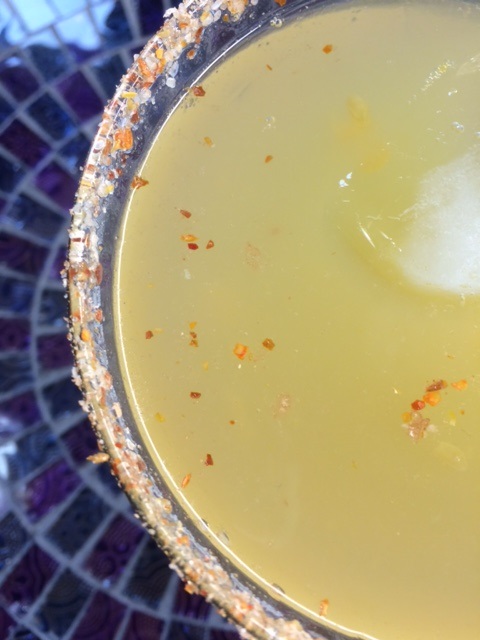
4 glasses, rims coated with Demitri’s Pomegranate Pineapple Lime Margarita Rim Shot (y’all need this stuff)
Garnish with tequila and chili powder marinated pineapple chunks (see below).

Spicy, Boozy Pineapple.
My pal Lauren came waltzing into my kitchen, eyes sparkling, like they do when she’s done something amazing. She held up a jar of something swimming in clear liquid and spices. “Here”, she said, “Smell!”. It was sweet, spicy, pungent and just what our cocktails needed. She had cored and diced a small pineapple, popped the pieces into a mason jar, added a 1/4 tsp of Tajin (a spice blend of salt, chili powder and dehydrated lime that you often find on grilled street corn), topped that whole thing with tequila and let it marinate. When you’re ready to use it, pull out a piece of pineapple and skewer it.

Combine all ingredients in a pitcher, pour equally into the 4 glasses. For your lushier pals, you can float some of that spicy tequila you used to marinate those pineapple pieces on top for an extra kick. Go on, we won’t judge you.

Sit back, sip and smile – You’re welcome.

cocktailtequila


So there you go! Easy, right? The great thing about those mixers? You don’t need to use them solely for cocktails. The chipotle habanero was an awesome addition to a marinade for the asada I used for my tacos. Two teaspoons of mixer, a 1/4 cup of red wine vinegar, a drizzle of oil a pinch of salt and a tablespoon of cumin and I was good to go. It’s truly versatile.

Of course, the disclaimer! I did receive compensation for this post – that being said, I will never recommend any product that I do not wholeheartedly trust and enjoy. Additionally, I may receive compensation through affiliate links, which keeps me in bacon and happiness.

Yours in your momma happiness, fueled by some pretty darned amazing cocktails,

Raina


Lemon Blueberry Jam

I’ll say it now and a million times again,

I. Love. Jam.

This is the time of year in the Pacific Northwest where berries and stone fruit are ripe and ready to be picked and savored immediately, or prepped to be set aside for the cold, dreary Seattle winters where you need to see some color. That time of year, you’re not going to be getting it from the sky, so it may as well come from the warm glow of something delicious!

This year I made a few jams-huckleberry, chipotle cherry, and my favorite lemon blueberry to have on hand over the winter. All have their place, whether it’s the huckleberry swirled into a cheesecake recipe I’ve got on the ready for this Easter, or the chipotle cherry slathered over a pork roast, with a splash of bourbon before roasting in the oven in the fall; but the lemon blueberry….it’s good on everything. Rich purple color, smooth and shiny texture; it screams summer. It comes together quickly and maintains it’s zip well into the doldrums of winter. You’re intrigued, right?  Sure, but I can hear you now though, but “Rai….canning is scary”!

Spoiler alert: it’s not. The key is to keep everything clean and hot and you’re good to go. Honest.

Ingredients:

2 lbs blueberries** washed, stems removed, and dried out ones removed
3 large lemons, juiced**
1 cup white, granulated sugar

**Shoot for organic where you can, and if you can hit up a blueberry patch and pick those bad boys yourself, you’ll save some money.

Equipment
4 pint jars with rings and lids, sterilized
Heavy bottomed pot, large enough to hold all of your berries and lemon juice
Large pot, tall enough to cover the cans by at least a few inches.
Jar grabbers
Kitchen towels-1 for clean up, one for setting your hot jars on
Pot holders
Ladle, or a deep spoon

Method:

  • Start by prepping your canning supplies-a tip: if it’s going to touch your jam, wash it. Easy, right?
  • Next, Fill your pot up with water, shooting for at least 2 times the height of your jar. When you process these bad boys, the water will need to cover the jars fully. Turn the heat on high. You’ll use this to sterilize your jars and bands.
  • Now, clean your jars! Even if I just opened the box and even if I washed the jars, bands and lids before storing, I wash them all again with a clean washcloth with hot and soapy water. Washing everything is a great time to make sure your jars do not have any chips or cracks-this could prevent sealing of your lids (no one wants mold or botulism), or cracking during processing.
  • Rinse your jars, bands, and lids to remove all the soap.
  • Set your lids aside in a clean bowl and place the jars and the rings carefully in your pot. **You don’t want to boil your lids. This can prevent the lids from sealing.
  • Now that you’re sterilizing everything, it’s time to make that jam!  In a heavy bottomed pot, combine the lemon, sugar, and blue berries and cook over medium-low heat for approximately 30 mins, stirring every few minutes to avoid sticking (and the dreaded burning), until most of the berries have fallen apart and turned into what resembles syrup.
  • You have a few options on what to do from here (yes, jam making is like a Pick Your Own Adventure book). You can keep going, letting that jam cook down even more or you can get ready to can it. I personally like little bits of fruit in my jam and less of a jelly texture. If you’re happy with the consistency, you’re ready to move to filling your jars; if not, continue cooking your jam down another 10 minutes, or until it’s the consistency you want. Keep in mind though, the more you cook it, the less you’ll have as a finished product!
  • By now, your jars have been bubbling away in the hot water and are all ready for your jam, so it’s time to prep your canning area. I lay a towel on the counter, which keeps my jars from moving around, but it also catches the spills I inevitably make. Set your pot of jam on a pot holder next to the towel. This makes for faster work pouring everything.
  • Remember that bowl with the lids? Get ready to pour hot water over them.
  • With your jar grabbers, carefully lift the first jar out of the hot water and pour some of that hot water over the lids until they are fully submerged.
  • Pour the rest of the water out of the jar, back into the pot and set your empty jar on the towel. Empty the other jars back into the pot and set them all on the towel. It’s ok if there’s a few drops of water in the jars, it won’t do anything to your finished product.
  • Slowly ladle or spoon the jam into each jar until they are filled up with 1/4 inch head space (room) from the top of the jar.
  • Take your other towel (or a paper towel), get it damp and wipe off the tops of the jars to remove any stickiness. Stickiness prevents a good seal folks.
  • I like to give a gentle tap to my jars, once filled, to get rid of any air bubbles. Be gentle though, you just heated that glass up!
  • Drain your lids from the bowl of water and place them on top of the jars and place the rings on, and finger tighten. The jars are going to be pretty hot still, so use a pot holder to avoid the hot glass.
  • Using your jar grabbers, gently place your jars back into the hot water filled pot and process (boil) for 15 minutes.
  • Once done, lift them out of the boiling water with your jar grabbers and let rest for 24 hours. The center of the lid should not bounce if pressed.
  • Store for a year with the rings removed, and eat whenever you’re ready!

Easy enough, right?  This is delicious over ice cream, in yogurt, or on toast. Ok, it’s really good eaten with a spoon, right out of the jar.

So there you are! A bit of sunshine in a jar, ready whenever you are.

Yours in a jam,
Raina

As 40 creeps closer…

It’s been  a year since my 40 by 40 list post was created and I am slowly getting through the list! I still have a lot of work to do, but have ticked off quite a few big items. One more year to go to as 40 creeps closer!

38 was the year of bills and home improvements. I paid off a small left over mortgage loan, and paid for a chimney rebuild and a new roof. That will be a lot more money in my pocket in the long run, but it sure was hard to say good bye to all that cash.  It’s also really nice not to have a failing roof, and a leaking chimney (hooray for maintaining structural integrity of this money pit…um, house!)

It was also the year of pushing myself-to learn more, do more, be more. You know, without getting all sorts of overwhelmed.

I also traveled alone, including business trips to Portland for Feast and Vegas to eat and for the Vegas Food Expo. I’ve never really been somewhere by myself, and so this was pretty huge for me!  Feast was my first time away from Izzy and while I was both terrified to be without her, I was so excited to be away and treat myself to a weekend away. Turns out taking a bath by yourself after eating a few thousand calories and then not sharing a bed with a tiny, raging octopus/toddler all night is AMAZING. That trip really prepped me for Vegas, where I hit quite a few of my goals-eating an amazing dinner, getting my first tattoo, singing loudly in front of strangers, and dancing in a huge sea of people.

I wrote more and collaborated with brands while not losing out on any of my creative desires. I spent more time learning herbal medicine and did a lot of wild crafting. I spent time nurturing my heart by making herbal goodies for friends, which reinforced how much I enjoy chemistry, biology and botany!

I built up the farm, too! I brought in 2 rabbits, which led to even more rabbits (see that whole thing here), and worked hard to not screw up growing carrots and peas. My corn thrived and grew taller than my house. I fed neighbors with the extra vegetables, and ripped up my lawn for more gardening space. It felt good to get up and out and push myself physically to make my home what I wanted it to be.

I participated in activities that fed my soul, more than fed my bank accounts. Let’s look at what I’ve been up to this year…the bold, italicized items are completed!

1. Do something that scares me, often!
2. Go to a ridiculously fancy dinner
3. Finally get that tattoo!
4. Pay off a large bill-not super exciting, but getting rid of any bill is more cash for fun
5. Be more accepting of my body, strengths and flaws
6. Go overseas again/travel more
7. Continue to get in shape -eehhhhhhh. A work in progress.
8. Skate more
9. Learn to knit
10. Make sourdough, actually keep it alive for more than 1 week
11. Do 5 push ups, well. Yeah, I said it. 5.
12. Do more karaoke
13. Make a blood orange olive oil milkshake like the one at the Olive Pit, in California-so good!
14. Fix up the garage and make it into a studio
15. Raise rabbits
16. Make more quilts
17. Finish up my herbalism classes
18. Eat fewer processed foods
19. Rock climb again
20. Hunt a deer and properly butcher it
21. Write more (hmmm…check?)
22. Make cheese
23. Go clam digging
24. Set up a friend version of Outstanding in the Field.
25. Teach Izzy to fish
26. Find more happiness-actively seek it out, and hold it tight
27. Successfully grow peas and carrots, and not little dinky ones
28. Bring Izzy backpacking
29. Take a photography class
30. Dance more
31. Build the fence that has been sitting in raw materials in my garage for 10 years
32. Kayak on Lake Washington
33. Ride in a hot air balloon
34. Go to Disneyland
35. Camp on a beach
36. Buy more nice knives
37. Teach more
38. Hike to a hot spring
39. Take a train ride
40. Read more

So what’s on tap for 39? More travel, more food and more finding and keeping what makes me happy. I’ll continue to tick things off of my above list and keep reporting back on all of my adventures!

Yours in squeezing all we can into life!

Raina


Spring foraging – Stinging Nettle Pesto

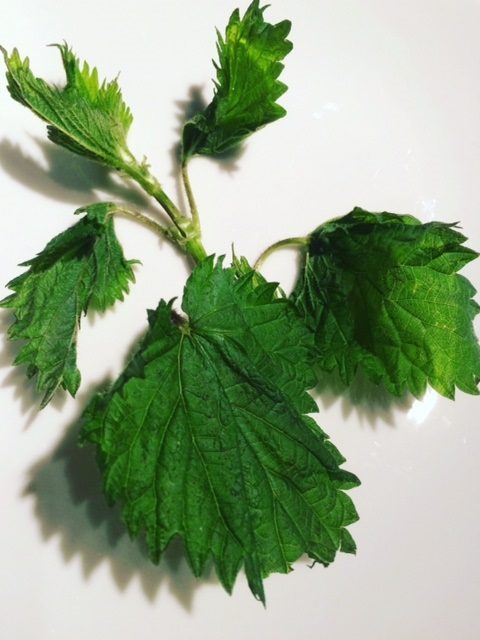
One of my favorite signs of spring is stinging nettle!  It’s easily foraged and from an herbal remedy standpoint, this super food is full of nutrients and minerals like fiber, calcium and iron. They may also help with allergies (of course, if interested in using nettles for herbal use, please check with your doctor first!). From a culinary perspective, it’s delicious and adds an amazing earthy flavor to soups, stews, breads, or my favorite: in place of basil for pesto.  If you can get past the sting, you’ll have one of the best ingredients that spring has to offer!

Nettle Pesto
Makes 5 cups

Ingredients:
1.25 lbs nettle or 3 cups blanched, liquid squeezed out
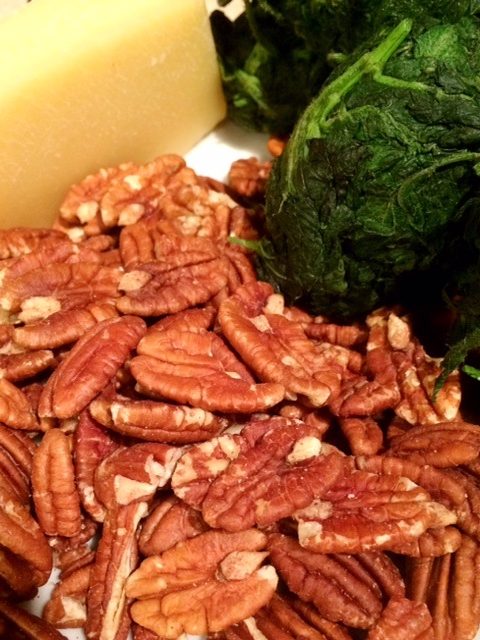
1/2 lb pecans, roasted (you can substitute your favorite nut here as well, keeping the same weight.
1 head garlic, or 10 large cloves peeled
1 large lemon, squeezed
1/2 cup olive oil
4 ounces parmesan, grated
1/8 tspn pepper, or more to taste
1 pinch of salt, or more to taste (add after you blend in your parmesan, which tends to be salty)
1 pinch red pepper flake (optional)

Equipment needed:
Stock pot, or other deep pot
Cookie sheet
Food processor
Cheese grater
Tongs
Gloves

Process:

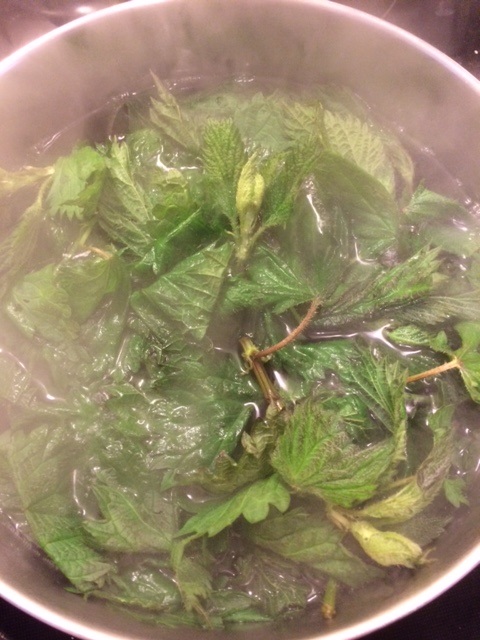
  • Start by getting your water going-fill a deep pot 3/4 of the way up with water and set on the stove on high. You’ll use this to blanch your nettles which removes the sting.
  • While that is heating up, you’ll start roasting your pecans. Lay them out in a single layer on a cookie sheet, place in the cool oven and turn it on to 300 degrees. Cook the pecans for 10-15 minutes, or until they are lightly toasted. As ovens vary, I would check them starting at 5 mins, and every 5 mins after until you can smell them and they are just starting to brown. Keep in mind they will continue to cook a little as they cool on the pan. Take them out and let them cool while you’re blanching your nettles.
  • Prep your nettles by removing the leaves from the stems. This is where the gloves come in as the sting can be painful and can last some time. If some of the newer stems are still attached, that is fine; the goal is to have as much of the lower, woody materials removed. You can also blanch everything, stems and all, and then remove the leaves after, which is what I did. The blanching will take longer, but it will also reduce your sting risk!
  • Using your tongs, place large bunches of nettle into the boiling water. Note: You want enough that this part doesn’t take forever, but not so much that the nettles clump up-you want the nettles to  move around so that they blanch quickly.
  • Let the nettles blanch for no more than 1 minute and remove to a colander to drain.
  • Continue blanching and scooping until you’ve gone through all of your nettles. **Tip:  You can save this infusion to drink!**
  • Lay your blanched nettles on a clean, dry towel or cheesecloth and roll the cloth up, squeezing as much of the moisture out as you can. Too much liquid can ruin the end pesto!
  • NOTE: If you have a smaller food processor, you’ll want to do this in two batches!  Grab your food processor and add in your fully cooled pecans, and pulse until broken down into smaller pieces. You’ll be adding in other ingredients and don’t want to make butter, so don’t go crazy here!
  • Add your cheese, pepper, red pepper (if using) and mix until it looks well distributed-usually a few good pulses
  • Add your nettles and pulse to break those bad boys down.
  • Add your lemon juice and pulse a few more times.
  • This is where the magic happens! Grab your olive oil and turn your processor on-slowly pouring the oil in. If you prefer a drier, thicker pesto, stick with the amount of oil listed. If you prefer a smoother, creamier pesto, add more oil slowly until you reach the desired consistency. There’s no wrong way here and you’ve made it through the hardest part!

You’re probably thinking…why does she prefer a drier pesto? I add this stuff to everything-soups, sauces, eggs; you name it. If I want a formal pesto, I can add more oil to it later. I can’t take the oil out after the fact!

So there you have it, an easy pesto with an element of danger, or at least a good sting.  What will you add your pesto to?

~Yours in earthy goodness~
Raina

Christmas with Maysara Wines

Hello dear readers!  I hope the holidays were good for you and that you have all been doing well!  2016 FLEW by, as did our holiday and time off. While I’ll give a recap of all that we did with our time off later this weekend, I wanted to share with you all that we ate for Christmas, and highlight some delicious wines that we tried, so that you can run out and try them for yourselves. There will even be an easy appetizer recipe that pairs perfectly with the wines, too. Are you ready for my recap of Christmas with Maysara Wines?

As you know, when my family cooks, we usually get a little crazy and cook too much. This Christmas we tried to dial it back a bit; I think we did pretty well!

Christmas 2016 Menu

~Breakfast~
Russian farmers cheese, bacon, and leek tart
Pomegranate-blackerry mimosas

~Dinner~
Appetizers:
Deviled eggs-regular and habenero
Caprese skewers
Bacon wrapped dates with blue cheese (recipe below)

Drinks to accompany our appetizers:
2013 Scarlett and Mac Chardonnay
Georgetown Brewing’s SparklePuss IPA

Main Course:
Honey and Orange Glazed Ham

Sides:
Mashed potatoes
Curry spinach salad
Brussels sprouts with bacon and balsamic reduction

Drinks:
Maysara 2012 Jamsheed Pinot Noir
Georgetown Brewing’s BA Not Tom Rye Stout

Dessert:
Key lime pie
Chocolate bourbon pecan pie

The dinner came together perfectly and since we didn’t have 20 separate dishes, we spent less time in the kitchen and more time chatting as a family.  We lazily ate and sipped wine through the late afternoon and evening, and listened to music. It was wonderful and I can’t think of any other way to spend the day.

Day After Christmas Feast

Normally, we put together a pretty big spread for Christmas eve, but between long hours at work and fighting illness, we just didn’t have it in us to cook an elaborate meal for Christmas eve. Instead we took advantage of the time and prepped cassoulet, which we then ate on the day after Christmas.

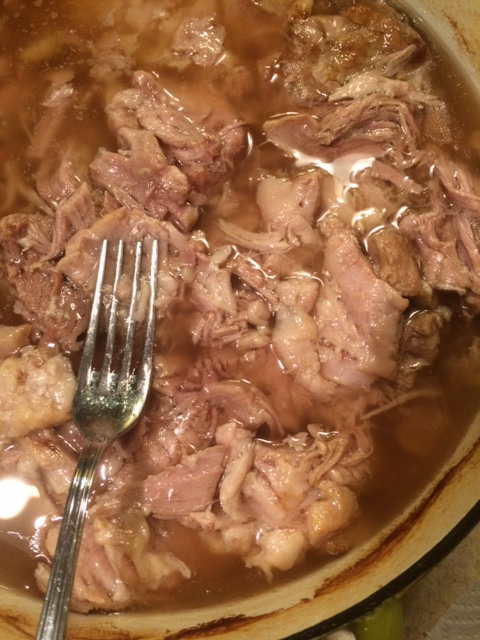
Wait. You haven’t had cassoulet??  It’s a delicious, indulgent French dish with duck confit, pork,  sausage, herbs and white beans. It’s a labor of love and if you have the time, it’s a wonderful treat to make. We loosely followed an old Jacques Pepin’s recipe, but this one is also a handy guide.  We made our own duck confit, substituted a double smoked sausage instead of making our own sausage, and to add an extra layer of richness, we braised the pork butt in bacon fat, almost making a pork confit.  Meat cooked in its own fat (or with a little extra fat) is good guys, calories be damned. The richness of the cassoulet only needed a simple salad with spinach, pears, candied walnuts with a light vinaigrette. We happily sipped Maysara’s  2010 Asha Pinot Noir, an amazing accompaniment which cut through the fat in the cassoulet but also stood up to the bite of the vinaigrette.

Overall, I’d say that we ate well this holiday and I’ve ignored the scale just in case. We spent our energy by prepping the time heavy meal slowly and over time, so that the flavors built on each other and that was definitely the right call.

Now, here’s more on those wines, followed by a super quick recipe that you should try with both wines. I’d love to hear what you think!

About the wines:

The 2012 Jamsheed Pinot Noir was outstanding, and at $30 it’s a nice bottle to have for a holiday or a special day, that’s still affordable. It’s slightly spicy, earthy with dark fruit. It’s soft on your tongue in that it doesn’t overwhelm, with a touch of acidity. It stood up to the variety of foods, but went well with the sweetness of the ham. This was definitely my favorite wine of the night and the holiday.

Coming in at $39 the 2010 Asha Pinot Noir was also a hit. With a glass cork, you feel like you’re getting a  treat! It was interesting how different this Pinot Noir was to the Jamsheed. Still earthy with dark berries, but more rounded and floral than the Jamsheed. The tannins cut through the fat, but the flavor isn’t lost to the duck, nor the smoke of the sausage. If anything, the flavors were reflected more in the wine. Again, another solid wine that I enjoyed.

Now, for the quick recipe. I love  these bacon wrapped dates (you could also use slices of pear in place of the dates and a slice of heartier blue cheese to mix it up). These pair quite well with the Jamsheed Pinot Noir!

Bacon Wrapped Blue Cheese Dates
Makes 10

1/2 lb bacon, cooked until the fat starts to drip but not crispy (6-8min.)
10 dried, pitted dates
Soft blue cheese (Trader Joes has a good one!)

  • Cut the strips of cooked bacon into 4 pieces each or less if you want more bacon
  • Open the dates. There is usually a cut along one side, but if not, just use a knife and slice half way through the dates, so you have a place to put the blue cheese.
  • Scoop in some of the blue cheese using a small spoon, or your fingers.
  • Wrap with bacon and pin with a tooth pic.
  • Bake for 8 minutes at 350 degrees to finish the bacon and make the dates a little softer.
  • To finish, drizzle with a little honey, or balsamic vinegar.
  • Let cool slightly and enjoy!

A hearty thank you to Dominic and all of the folks at Maysara winery for helping to make this holiday particularly special. While I did receive these wines to try and this is considered a sponsored post, I do highly recommend these wines and cant wait to share one more recipe featuring their wines soon!

To you and yours, and delicious food!

Raina

Blue Cheese Butternut Squash Soup with Chicken and Mushrooms

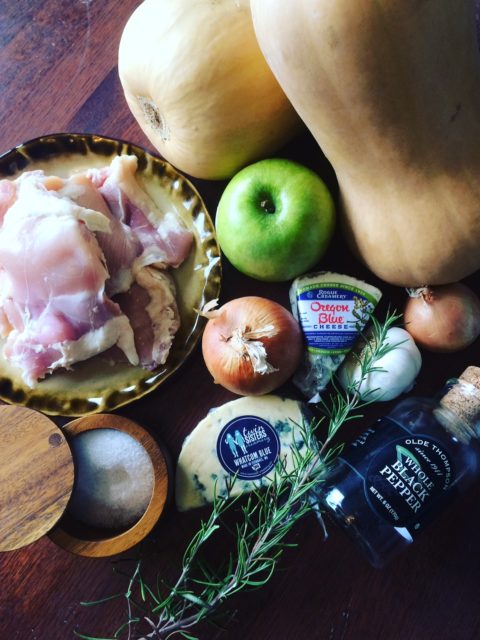
soup ingredientsFall hit here pretty quickly in Seattle; cool winds replacing the abnormally high summer temperatures. The leaves are changing and starting to fall and this week promises rain. I’ve been scurrying around the gardens, picking  the last of my tomatoes, hoping that whatever is still green has time to ripen. The air is crisp and the sun is setting earlier and earlier, which means it’s time for soup. Enter: my Blue Cheese Butternut Squash Soup with Chicken!

This recipe is flavorful, easy to make, and while it tastes rich, is surprisingly low in calories. You can add more ingredients to make it more hearty, but it’s perfect in its’ simplicity. I usually make a double batch, freezing half, to enjoy late into the winter when I am too tired to make a batch of soup. Roasting the vegetables in advance brings depth of flavor to the soup, but isn’t necessary if you’re in a rush for a bowl of warm, creamy comfort.

Let’s start by gathering our ingredients:

4-5 lbs of butternut squash, cut in half with seeds removed, and roasted (see prep notes)
2 lbs chicken thighs (breasts, if you’re wanting less fat/calories), cut into bite size pieces
1 cup white wine
64 ounces chicken stock
1 lb mushrooms
1 green apple, diced
3 medium yellow onions, diced and roasted (see prep notes)
1/2 head of garlic, peeled and roasted (see prep notes)
1-2 sprigs of rosemary
1 large bay leaf
1/2 lb of bacon, chopped, drippings reserved (substitute 2 Tbspn olive oil if you do not wish to use bacon)
Salt and pepper to taste (about a teaspoon each)
Low fat sour cream, for garnish
3-4 ounces blue cheese, sprinkled on top
Optional: 1/2 lb chopped kale for more heft and nutrients

Prep:
Roasting makes everything better-the flavors become more pronounced and it brings out a richness to the squash you wouldn’t get otherwise. To do this, coat a cookie sheet with olive oil and lay out your squash, roasting at 350 degrees for 50 minutes. While that cools, roast your onion and garlic for 10 mins at 350 degrees, or until  they start to turn golden. Set aside.

Cook:
In a heavy bottomed pot, fry the bacon until crispy, removing from the oil when done. Add your chicken pieces, and cook until browned. You can avoid using bacon and instead brown your chicken in 2 Tbsp olive oil if you wish (I love bacon, but this does add fat, sodium and calories to the dish). Pull out your chicken and set aside with the bacon.

See all those delicious bits on the bottom of your pan? You want those. All of those tasty bacon-chicken bits add flavor! Add 1 cup of white wine and scrape the bottom of the pot-the finished soup (and your belly) will thank you for deglazing everything!

Add your roasted squash to the deglazed pot by scooping the meat of the squash out of the skin. Add your onion, garlic, apple, salt, pepper and stock to the pot and let simmer for 20 minutes until  everything starts to fall apart, stirring occasionally. At this point, you have a choice-you can use an immersion blender to make everything creamy and smooth, or leave it as is for a soup with a little more texture-I prefer to blend the base, personally.  If you do opt to blend, pull out the rosemary and bay leaf.

If you’re using kale, now’s the time to add it, cooking for 15 minutes. If not, move to the next step.

Add your chicken, mushrooms and your bacon and continue to simmer for additional 20 minutes, or until your chicken is cooked through (no longer pink, registering 165 degrees, if you want to get technical).

Ladle into a deep bowl, adding blue cheese and sour cream. Enjoy!

That’s it!  This soup will taste like you spent hours making it, and will fill that craving for a warm delicious soup to warm you up as the weather changes. What could be better?

Note:
Some people do not like blue cheese and I get it!  It can be strong and for some, overpowering. If you fall into this camp, substitute Parmesan, adding the rind in when you’re cooking your kale and chicken and pulling out when you’re done cooking. Top with grated Parmesan at the end.

I want to thank Foster Farms for funding this post. Their Simply Raised chicken are raised without antibiotics, hormones, or steroids, which is important to my family. Additionally, they are American Humane Certified and local to WA, OR, and CA, so there’s less impact on the environment!  Foster Farms also has organic options, which are available at most larger grocers and Costco (again, who doesn’t love Costco?!). For more information on Foster Farms, their products or their practices, check them out here. Again, this post is sponsored by Foster Farms®, the opinions expressed are my own.

Yours in delicious fall flavors,

Raina

Back to a moment

It’s funny how a scent can do so much-bring you back to a moment, connect you to someone, remind you of a place. For me, scent is emotive, and I connect so many scents with memory.

Tonight, I reached for soap to wash my hands, grabbing blindly to wash off my kiddos bright blue bathwater after letting out the drain plug. I inhale.

Johnson & Johnson’s no more tears bath wash. I smile. I never buy it. It’s crap, but her dad picked some up.

I inhale and smile again. Instantly, I am at Seattle Children’s Hospital, out of the NICU and in specialty care. We’re being taught how to give our 5 day old baby a bath with an ng tube.

There’s squeals; mine and hers. Laughter; ours and the medical staff. Everyone has gathered around our little amazing baby as they know we’re on our way out of the hospital soon. That smell; that clean, soapy smell reminds me of every passed medical test we had to go through, every exam, every medical team amazed at how strong my baby was, at how strong we were.

I stop and look at Izzy now, post bath. Her hair is slicked down and she’s so big now, reasoning with me why she shouldn’t have to eat dinner or go to bed. She’s three and soon, she won’t need me. I inhale and smile. She’s still my baby girl.

Izzy pic

Yours in love

Raina

Sew Long

Hi there!

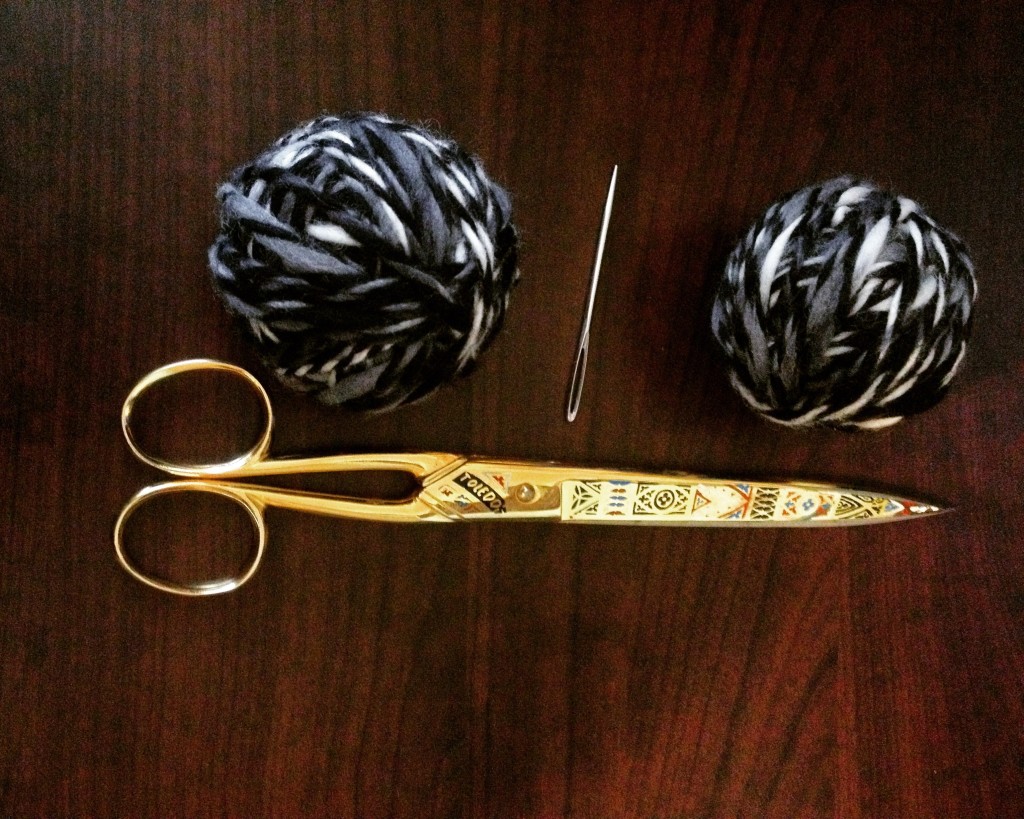
It feels like it has been a long time since I just sat down and was able to sew. I forget that it is really a relaxing activity for me. The feel of my scissors cutting through new fabric, matching up of corners, the sound of my machine whirring as fabric comes together into something more than it’s original  parts.

A few years ago, I started making quilts and clothes for myself and Izzy. I am by no means great at it, but I love teaching myself a new skill and enjoy watching something come together from a pattern, or a sketch. You know that feeling when you sit down and just focus on one task and when it’s completed, you feel both relaxed, but proud of yourself? Sewing does that for me. I love it.

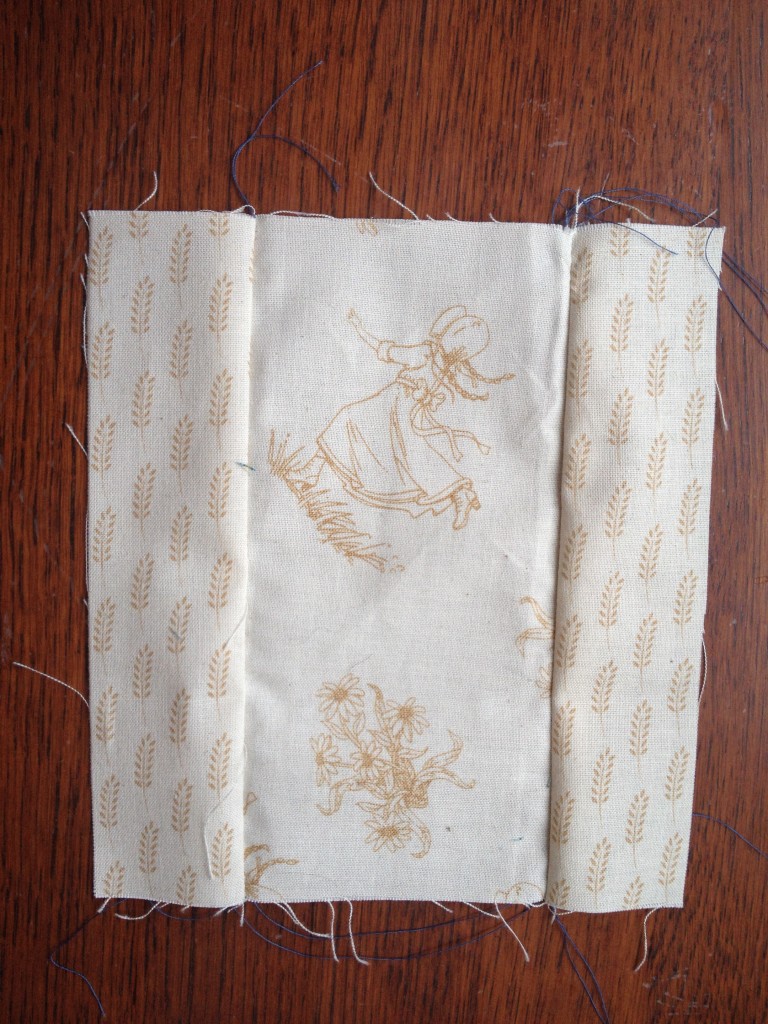
I recently had a chance to try fabrics from the Little House on the Prairie Andover Fabrics Collection. The fabric has an awesome vintage look, with pretty colors and patterns. Even better? It holds up well when you have to pull out stitches after not lining up seams. Fabric that doesn’t fray when you pull stitches is great-you have less waste, less frustration and you can feel OK with having to redo a quilt patch when needed (even if you end up redoing it three times for one section like me). The fabric also has a good feel-thick and soft, right off the bolt.

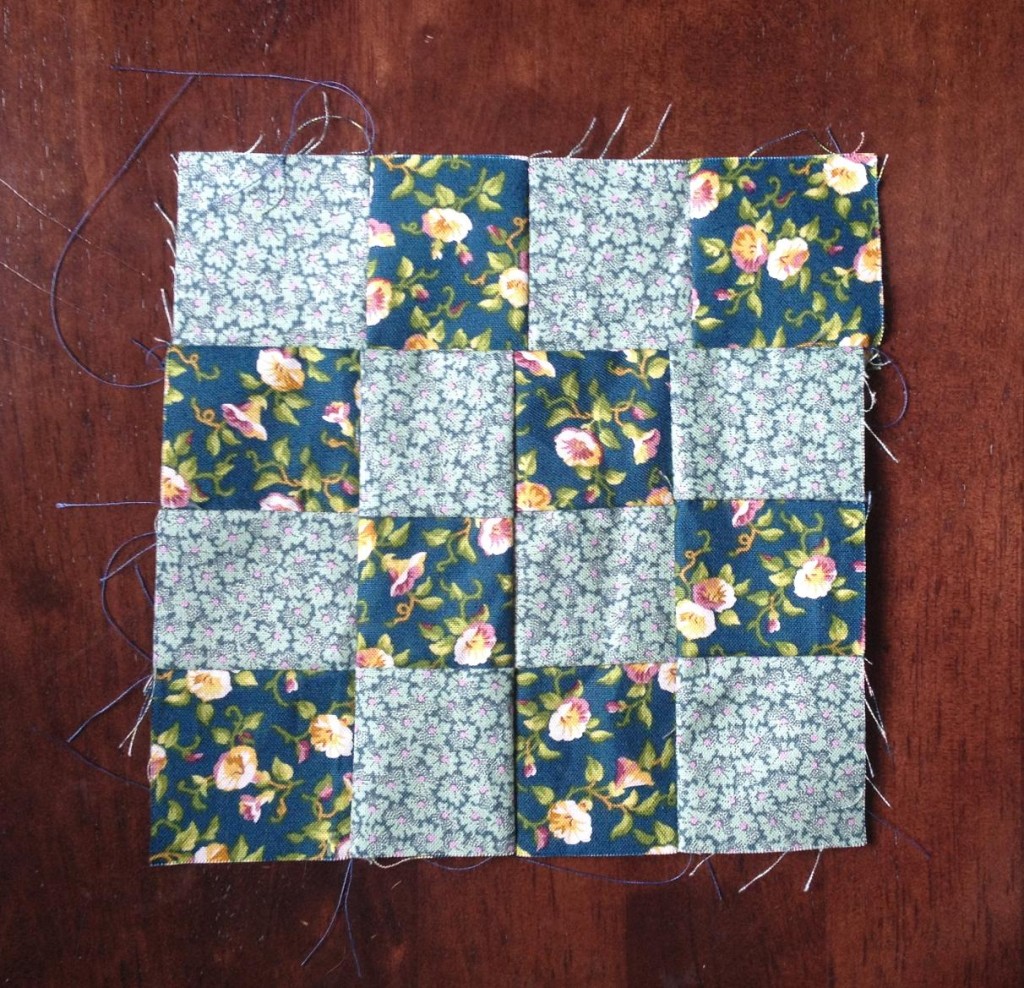
Here’s a look into what I am working on! Its a few squares into a sampler quilt that will be twin sized. Izzy’s room is filled with vintage and antique items, and this quilt should fit right in!

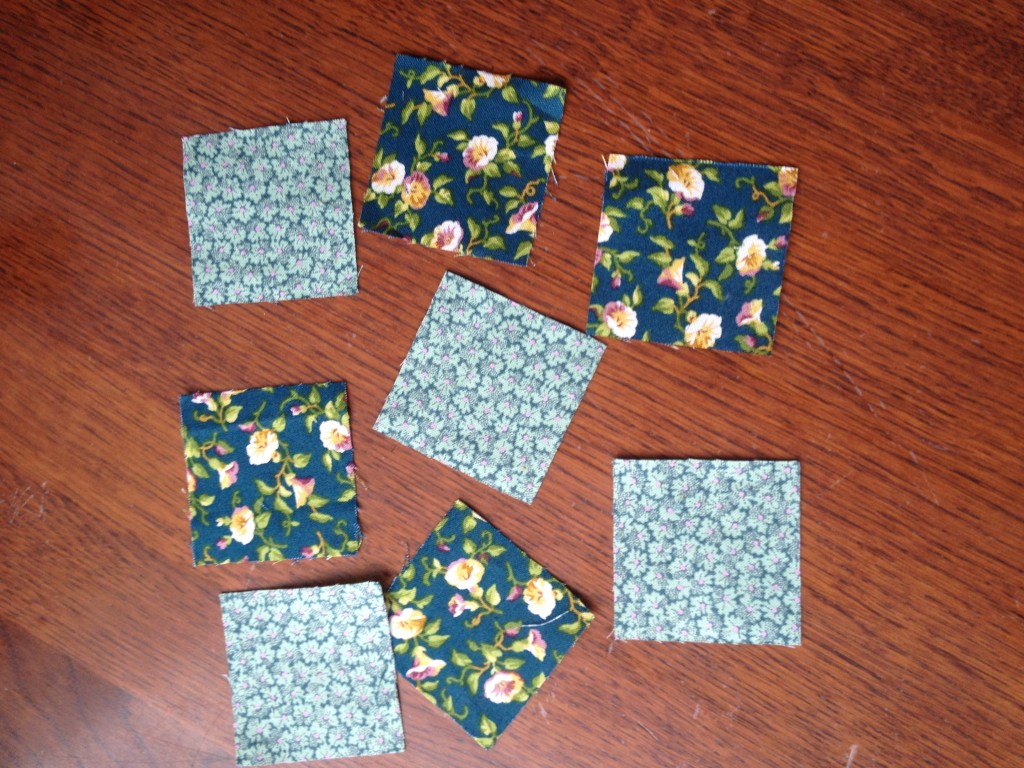
First, I started off easy, making a patch quilt block, with a lot of little squares. It came together quickly, which inspired me to branch out and make something a little more complicated that I sketched out.


IMG_1303IMG_1306IMG_1316IMG_1308

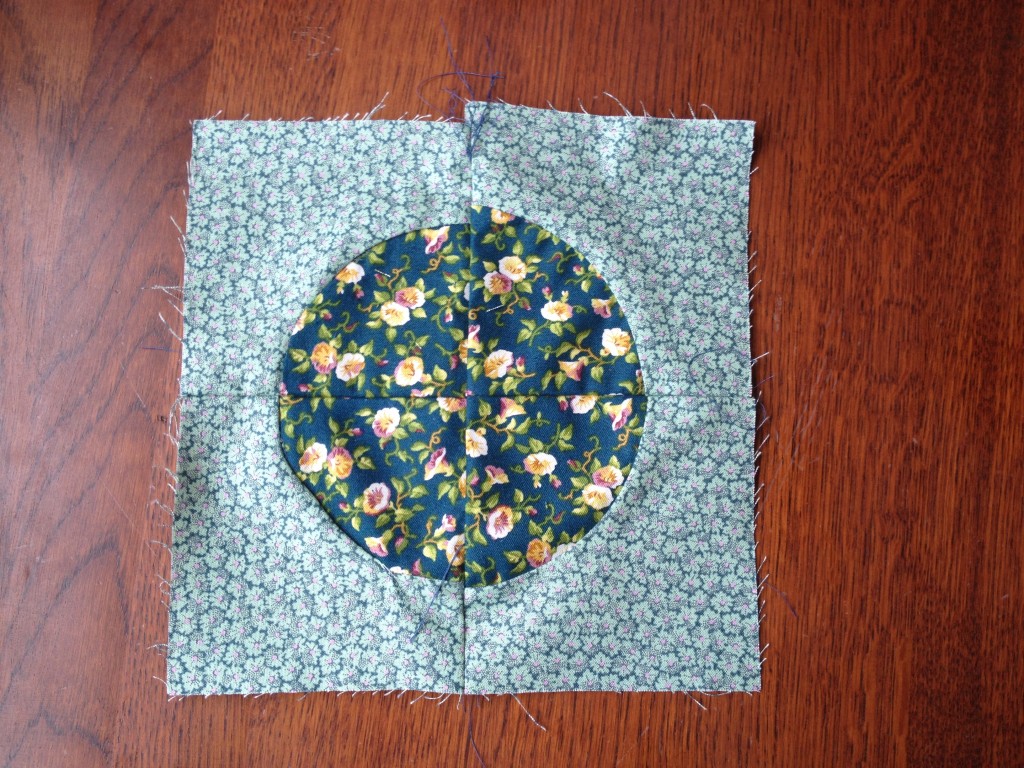
After that, I wanted to go bigger and make this next block, a Drunkards Path. This one was hard, was the one that I had to redo a few times and am still tweaking to get it just right.

fabric

IMG_1302

Fun right? A little time, a little patience, and a glass or two of wine, and you have some fun quilt blocks. That’s my kinda craft.

Interested in getting your hands on your own fabric? You can enter the rafflecopter for a chance to win all of this awesome swag, valued at over $380! What could you win??

    • A fat-quarter bundle of all three Little House on the Prairie® fabric collections
    • A limited edition tote bag made of Little House on the Prairie® fabric
    • The Deluxe Remastered “Little House on the Prairie” Complete Collection DVD Set
    • “The Legacy of Laura Ingalls Wilder” DVD
    • The Quilting with Laura book
    • The World of Little House book

swag

So there you go. You have ideas, the allure of fun goodies; now all you need is to enter to win!

a Rafflecopter giveaway

For more information and ideas, please check out the Little House on the Prairie site!  Thank you all for reading! What would YOU make with these fabrics?

Yours in sewing,
Raina

Disclaimer: I did receive a sample of the fabric to help create this post, but the opinions are all mine! My promise to you, dear reader, is that if I don’t like a product you won’t see it here.

Making the most of local

I love making the most of local foods, idea of knowing my farmer, and exactly where and how my food is raised, and the idea of using all parts of an animal any time I can makes me happy. I feel good knowing that the meat I am eating was well cared for, loved and had the chance to roam. Guys, let me show you something.

okanoganKatahdin lamb

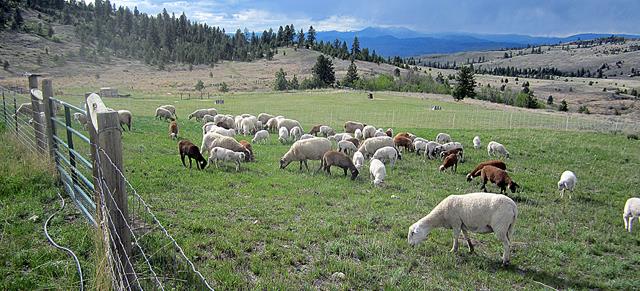
This is Island Mountain Farm, in the Okanogan Highlands, where I get my lamb. Lovely right? Those little guys are Katahdin lamb, a breed raised for excellent meat quality. They are happily raised and finished on dryland pasture and happy animals, raised well in open areas, means healthy and good meat. They are just one of the farmers you can connect with at Barn2Door.  Remember my Salmon Post? Local food delivered straight to you is amazing! Barn2Door is a marketplace where you can buy sustainably grown meat, fish, fruits, vegetables & items like lamb and even real maple syrup right from producers and growers. Farmers, fishers, ranchers and gardeners have their own store – like Etsy for farms –  where they showcase the food they have for sale, and manage direct communications, sales and fulfillment (local delivery, national shipping or both!). Want more info?  Check them out, sign up for their newsletter, and keep reading for a discount code! Who doesn’t love that?!

Over the next few weeks, starting with this post, I have a goal: I’ll stick with my love of showing you how good it can be to know your food and where it comes from, but I want to help you feel comfortable with different types of meat and cuts of meat. Are you ready?

Years ago, families used more of the animal than we do now-if you were to ask your grandparents, or your great-grandparents, likely they would tell you about how they ate things like organ meat, things like liver, kidneys. They used these other parts of the animal because they knew how to cook it, it was good nourishment, and often, it was something that they raised themselves. I love the idea of getting back using as much of the animal as often as possible. It’s respectful of the animal, and can be lower in cost. If you looked in my freezer right now, you’d see a lot of random things-tripe, beef tongue, hearts, various kidneys, beef and chicken bones for stocks. All good, tasty and nourishing things, but not the standard foods you may be used to seeing. At first, I was nervous about cooking them. Would they be good? Are they hard to cook? Would my family and friends think I am crazy for serving them this stuff? So far, the odds have been in my favor. Like any food, how you cook it, and how you present it is key. Keeping things simple, with good ingredients is a great way to make food approachable.

My recipe for you all today is Seared Lamb Kidneys With Red Wine Glaze. It’s super easy from start to finish, and if you can cook bacon, you’ll be more than good on this!  I’ll start with the basics and add a couple quick twists.

Seared Lamb Kidneys With Red Wine Glaze
Serves: 6-8 as an appetizer, 4 as a hearty side
Time: 45 minutes

Ingredients:

1 lb lamb kidneys
4 slices thick bacon
1/4 c red wine-I used a Sangiovese
1 cup stock – I used lamb stock
1/4 tsp pepper
1/8 tsp salt or more to taste
3 cloves garlic, minced
3/4 of a small bulb of shallot, finely chopped

Method:

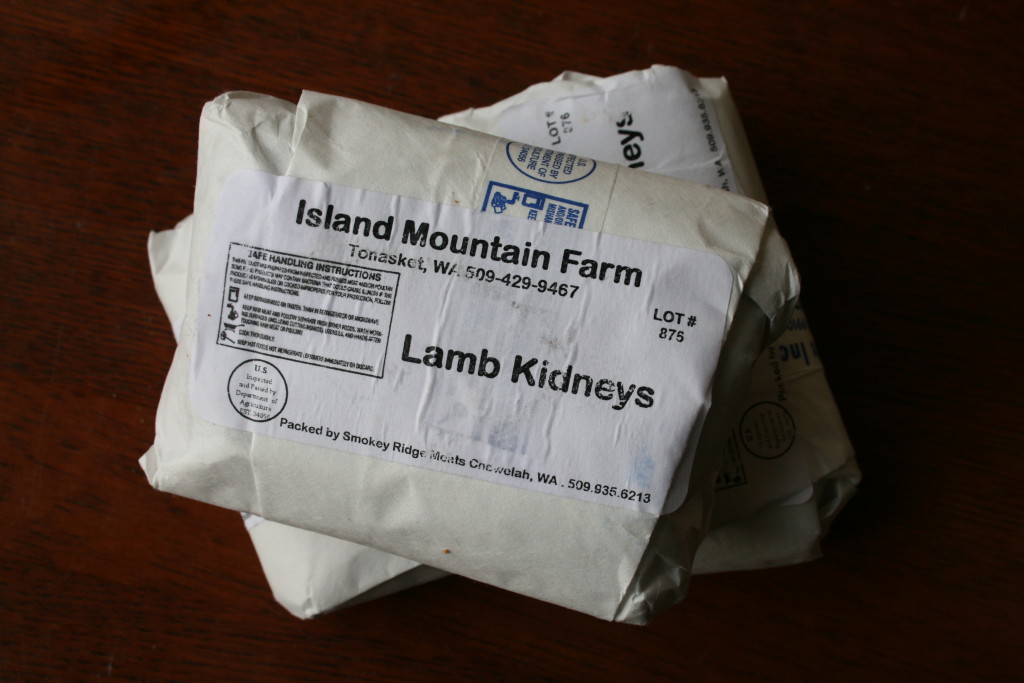
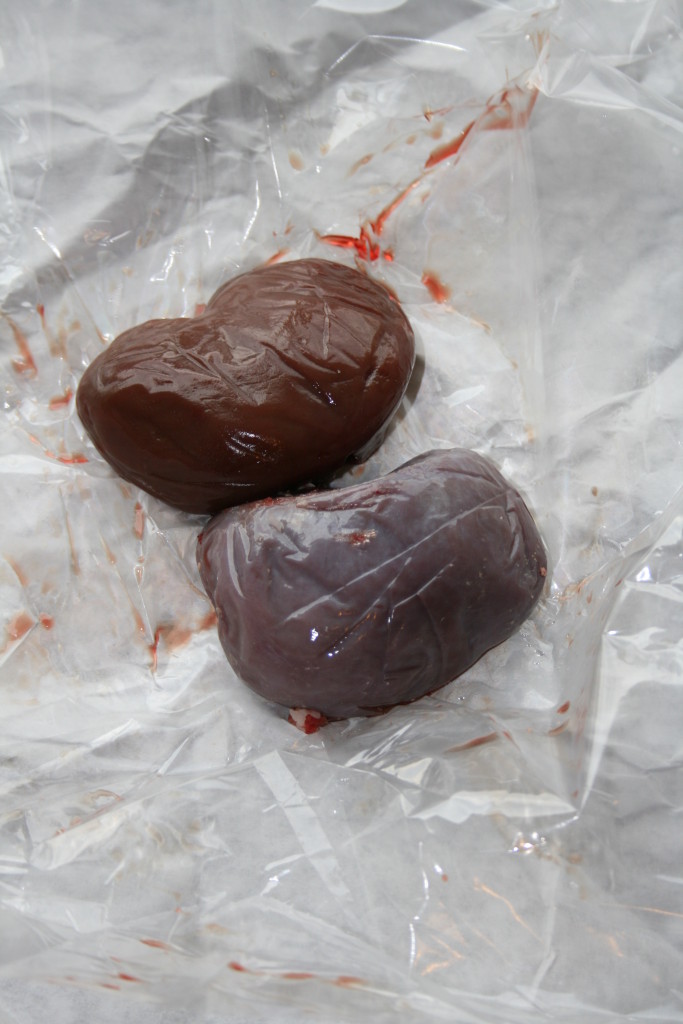
Island Mountain Farm Lamb Kidneys

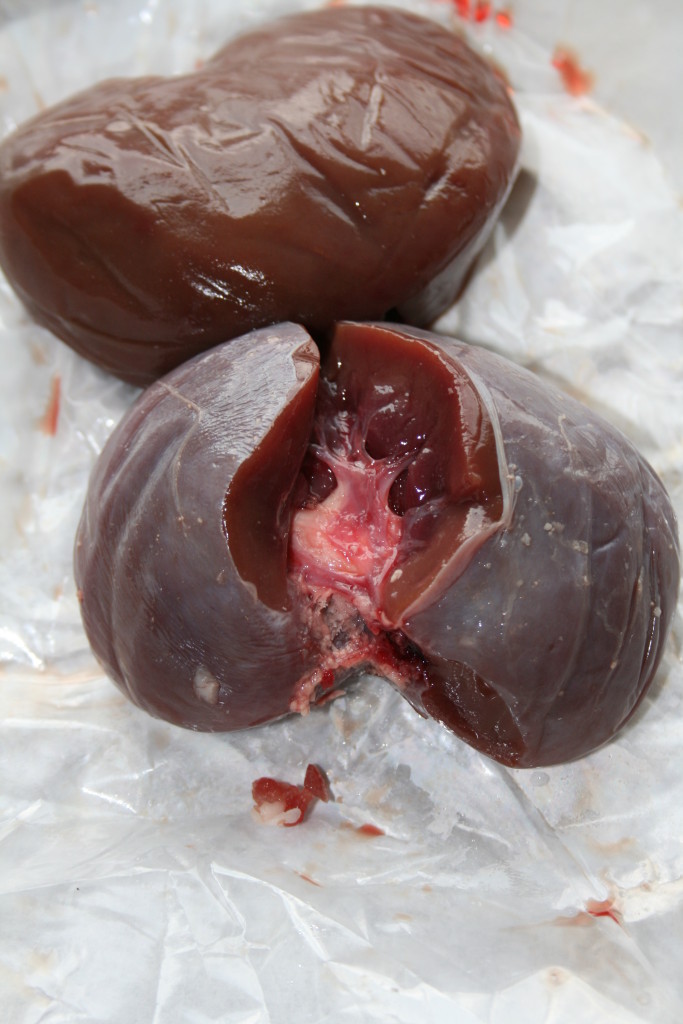
  1. Trim any excess tissue or fat from around the kidneys, cut them in half and remove the tough, white core.
    kindeys with skinkidney core
  2. Chop them in small bite sized pieces and set your kidneys aside.
  3. Mince your garlic and finely chop your shallot, set both aside.
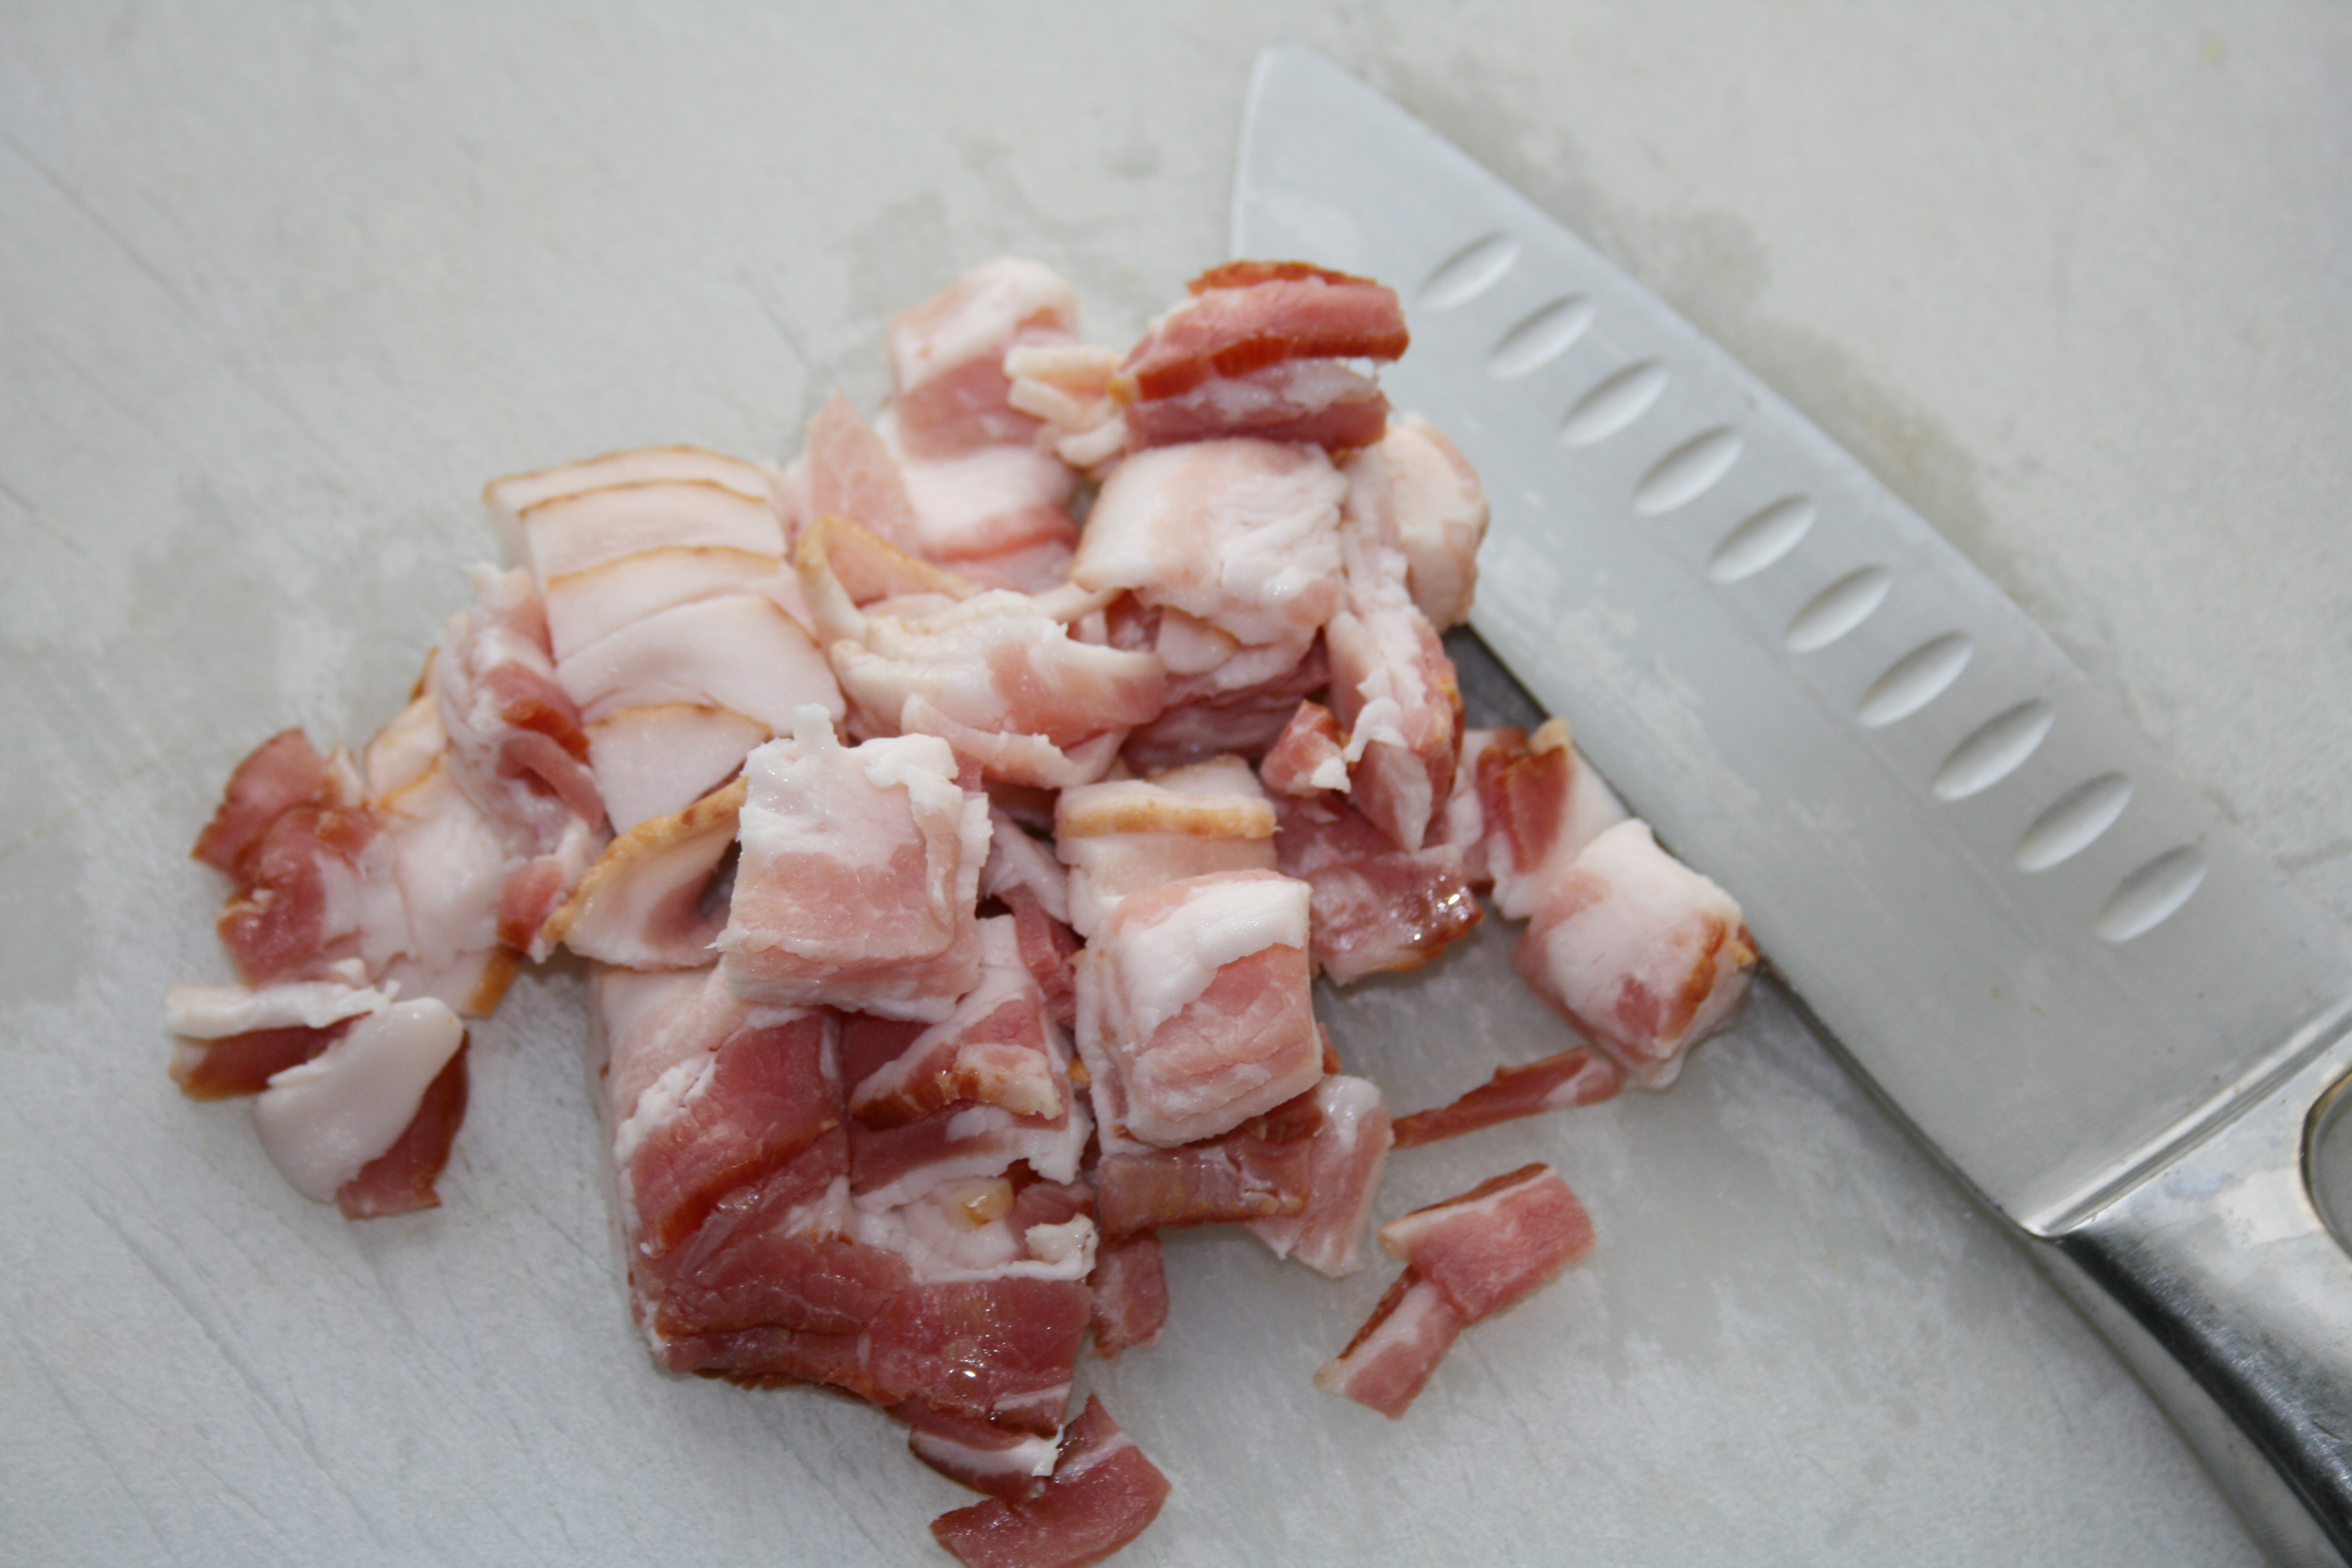
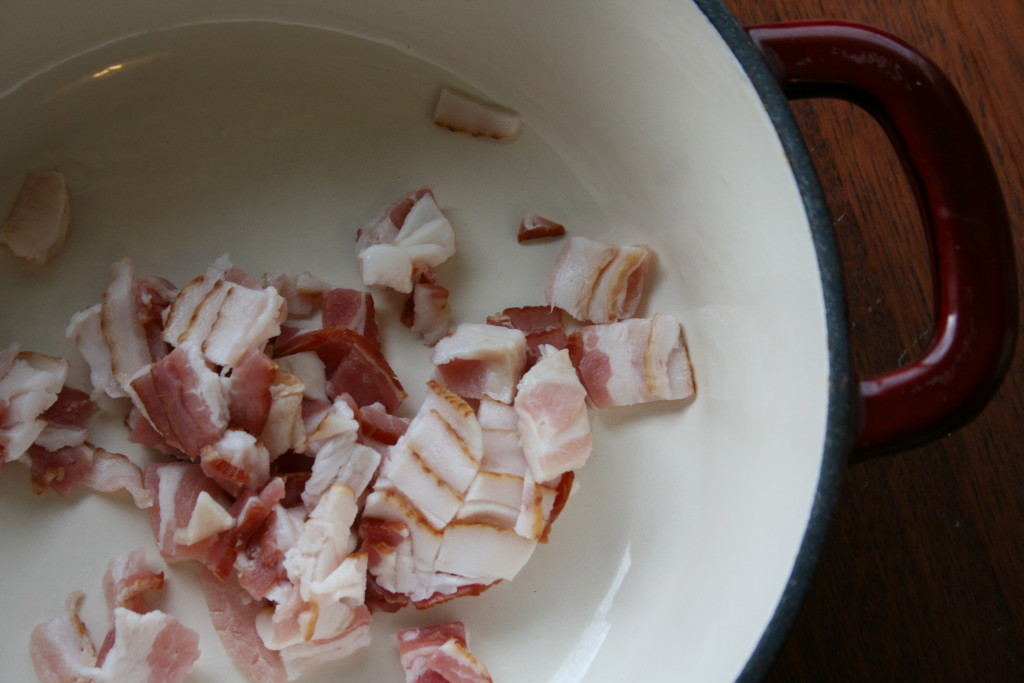
  4. Chop your bacon into bite sized bacon and add to a cool, deep pan-I like my 3 quart dutch oven for this. Fry your bacon until crisp and remove-placing it on a paper towel to drain.
    chopped bacon sauteed bacon
  5. Add your shallot and sweat in the bacon fat, until they just start to get translucent – about 1-2  minutes and then add your garlic until it starts to turn a light, light brown. You’re getting close!
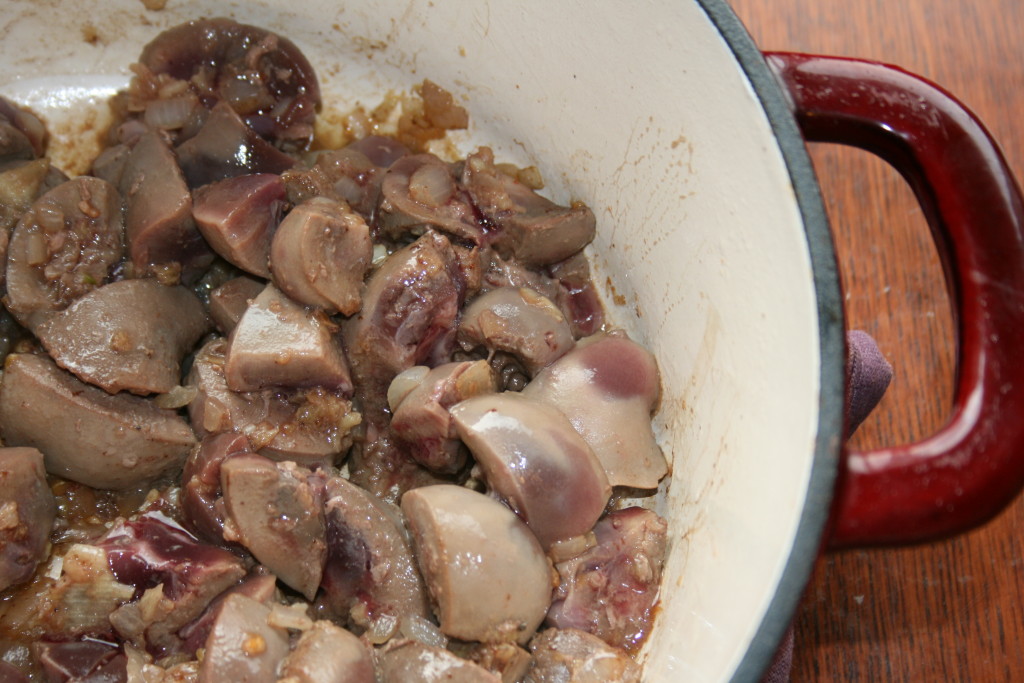
  6. Add your lamb kidneys and let them cook. You want them to get a little seared, and a little more yummy about 2-3 minutes Don’t stir!
    cooking kidneys
  7. Add your salt and your pepper and flip your kidneys. Cook for another 5-10 minutes, or until there is very little red remaining. Pull out, keeping any liquid (if any) in your pan and place off to the side.
  8. Add your wine and scrape all of those tasty bits off of the bottom of the pan (this is called deglazing).
  9. Add your lamb stock and your reserved bacon.
  10. Let this reduce to about 1/3. If it doesn’t thicken up, pull out a few tablespoons of the liquid, mix in a spoon full of flour until incorporated and add this all to your sauce.
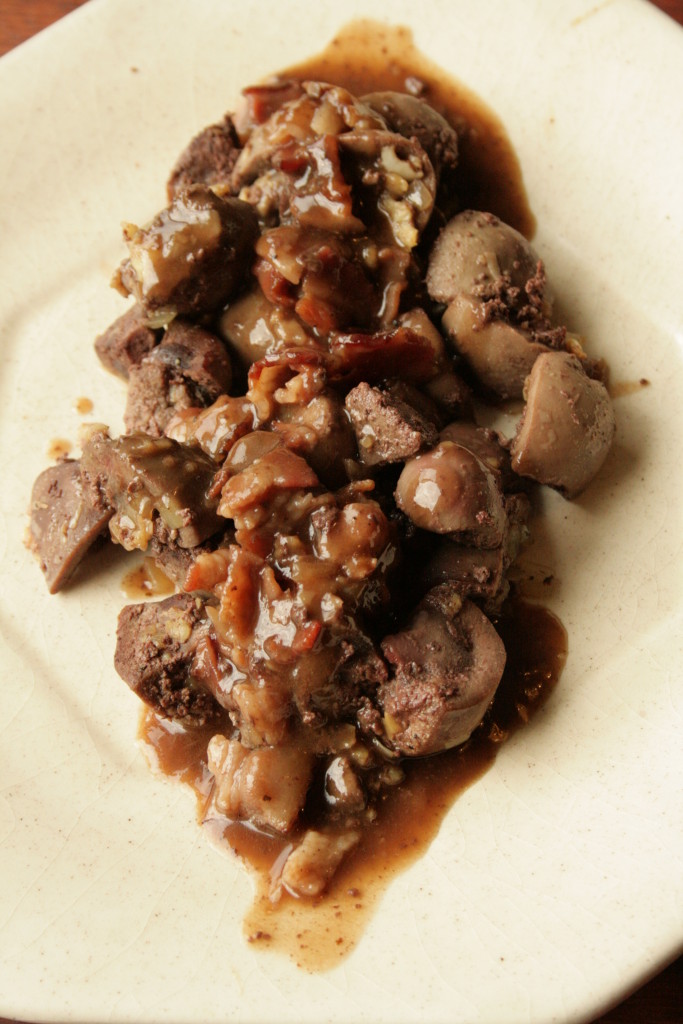
  11. Plate your kidneys and drizzle your sauce over it all!
    IMG_0738

That’s it! Serve as a side, or as an appetizer on toasted baguette.

Now for the twist!

Do everything above, but throw your kidneys in a food processor and blend up until smooth to make a dip. Add to crostini and drizzle your sauce over them. If you’re not quite ready to try kidneys, this recipe works really well with liver, too (same amounts as the above!).

SO easy, right?

Are you ready to get local food straight from the farmer? Head on over to Barn2Door, enter your zip code, find something amazing, and add in the code MAKEMENDGROW15 -at check out for $15 off a $50 purchase – good from now through November 6. Please check out Barn2Door on Facebook, and Island Mountain Farm’s Barn2Door site, their Website, and Facebook Page!

I’d love to hear from you on what you pick up and make!

Yours in whole foods,
Raina

Disclaimer: While I do love Island Mountain Farms and Barn2Door, this is a sponsored post. Photos of Okanogan and the Katahdin lamb courtesy of Island Mountain Farms, all other pictures are my own.