I’ll say it now and a million times again,
I. Love. Jam.
This is the time of year in the Pacific Northwest where berries and stone fruit are ripe and ready to be picked and savored immediately, or prepped to be set aside for the cold, dreary Seattle winters where you need to see some color. That time of year, you’re not going to be getting it from the sky, so it may as well come from the warm glow of something delicious!
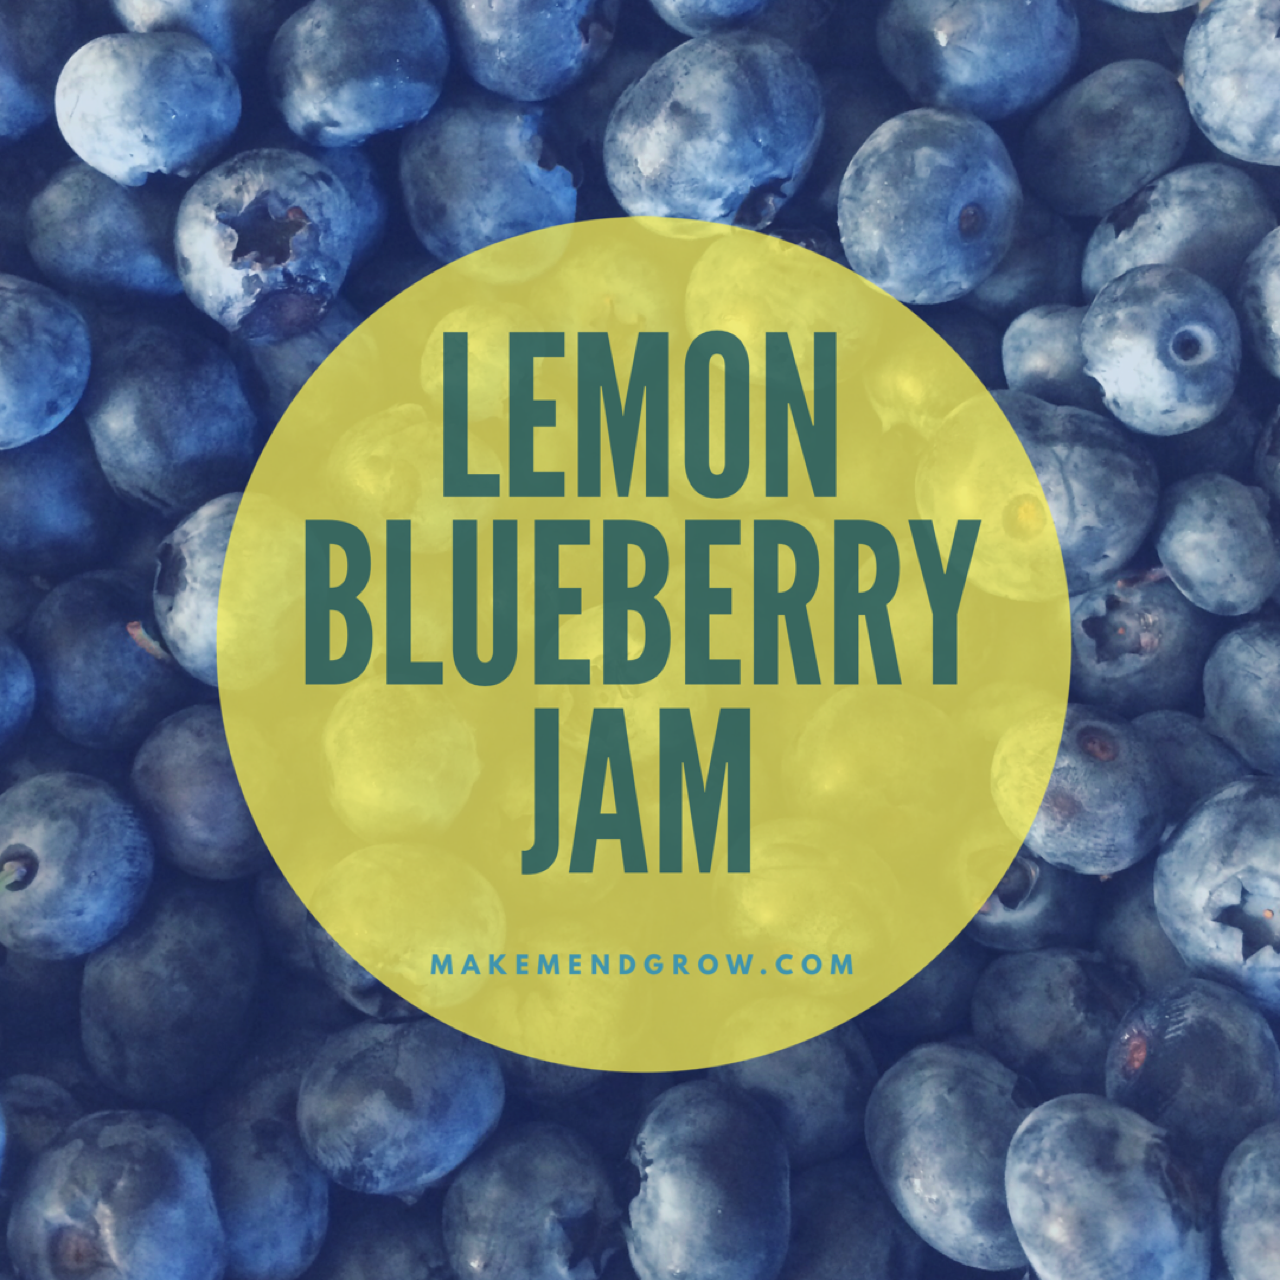
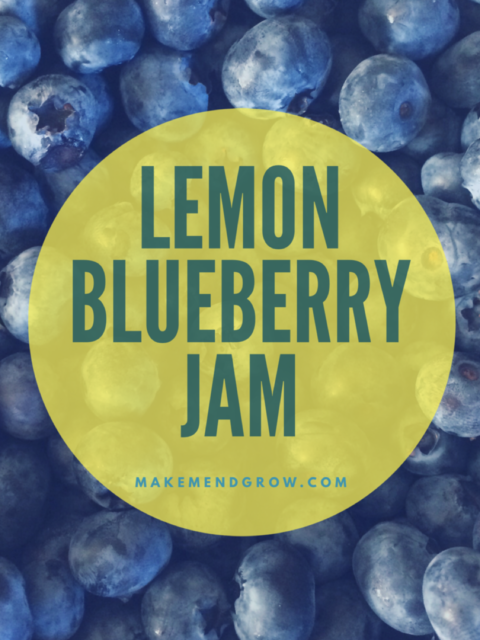
This year I made a few jams-huckleberry, chipotle cherry, and my favorite lemon blueberry to have on hand over the winter. All have their place, whether it’s the huckleberry swirled into a cheesecake recipe I’ve got on the ready for this Easter, or the chipotle cherry slathered over a pork roast, with a splash of bourbon before roasting in the oven in the fall; but the lemon blueberry….it’s good on everything. Rich purple color, smooth and shiny texture; it screams summer. It comes together quickly and maintains it’s zip well into the doldrums of winter. You’re intrigued, right? Sure, but I can hear you now though, but “Rai….canning is scary”!
Spoiler alert: it’s not. The key is to keep everything clean and hot and you’re good to go. Honest.
Ingredients:
2 lbs blueberries** washed, stems removed, and dried out ones removed
3 large lemons, juiced**
1 cup white, granulated sugar
**Shoot for organic where you can, and if you can hit up a blueberry patch and pick those bad boys yourself, you’ll save some money.
Equipment
4 pint jars with rings and lids, sterilized
Heavy bottomed pot, large enough to hold all of your berries and lemon juice
Large pot, tall enough to cover the cans by at least a few inches.
Jar grabbers
Kitchen towels-1 for clean up, one for setting your hot jars on
Pot holders
Ladle, or a deep spoon
Method:
- Start by prepping your canning supplies-a tip: if it’s going to touch your jam, wash it. Easy, right?
- Next, Fill your pot up with water, shooting for at least 2 times the height of your jar. When you process these bad boys, the water will need to cover the jars fully. Turn the heat on high. You’ll use this to sterilize your jars and bands.
- Now, clean your jars! Even if I just opened the box and even if I washed the jars, bands and lids before storing, I wash them all again with a clean washcloth with hot and soapy water. Washing everything is a great time to make sure your jars do not have any chips or cracks-this could prevent sealing of your lids (no one wants mold or botulism), or cracking during processing.
- Rinse your jars, bands, and lids to remove all the soap.
- Set your lids aside in a clean bowl and place the jars and the rings carefully in your pot. **You don’t want to boil your lids. This can prevent the lids from sealing.
- Now that you’re sterilizing everything, it’s time to make that jam! In a heavy bottomed pot, combine the lemon, sugar, and blue berries and cook over medium-low heat for approximately 30 mins, stirring every few minutes to avoid sticking (and the dreaded burning), until most of the berries have fallen apart and turned into what resembles syrup.
- You have a few options on what to do from here (yes, jam making is like a Pick Your Own Adventure book). You can keep going, letting that jam cook down even more or you can get ready to can it. I personally like little bits of fruit in my jam and less of a jelly texture. If you’re happy with the consistency, you’re ready to move to filling your jars; if not, continue cooking your jam down another 10 minutes, or until it’s the consistency you want. Keep in mind though, the more you cook it, the less you’ll have as a finished product!
- By now, your jars have been bubbling away in the hot water and are all ready for your jam, so it’s time to prep your canning area. I lay a towel on the counter, which keeps my jars from moving around, but it also catches the spills I inevitably make. Set your pot of jam on a pot holder next to the towel. This makes for faster work pouring everything.
- Remember that bowl with the lids? Get ready to pour hot water over them.
- With your jar grabbers, carefully lift the first jar out of the hot water and pour some of that hot water over the lids until they are fully submerged.
- Pour the rest of the water out of the jar, back into the pot and set your empty jar on the towel. Empty the other jars back into the pot and set them all on the towel. It’s ok if there’s a few drops of water in the jars, it won’t do anything to your finished product.
- Slowly ladle or spoon the jam into each jar until they are filled up with 1/4 inch head space (room) from the top of the jar.
- Take your other towel (or a paper towel), get it damp and wipe off the tops of the jars to remove any stickiness. Stickiness prevents a good seal folks.
- I like to give a gentle tap to my jars, once filled, to get rid of any air bubbles. Be gentle though, you just heated that glass up!
- Drain your lids from the bowl of water and place them on top of the jars and place the rings on, and finger tighten. The jars are going to be pretty hot still, so use a pot holder to avoid the hot glass.
- Using your jar grabbers, gently place your jars back into the hot water filled pot and process (boil) for 15 minutes.
- Once done, lift them out of the boiling water with your jar grabbers and let rest for 24 hours. The center of the lid should not bounce if pressed.
- Store for a year with the rings removed, and eat whenever you’re ready!
Easy enough, right? This is delicious over ice cream, in yogurt, or on toast. Ok, it’s really good eaten with a spoon, right out of the jar.
So there you are! A bit of sunshine in a jar, ready whenever you are.
Yours in a jam,
Raina