On Memorial Day


dad2

Dad3

Dad4

Dad5

Memorial Day-Every year I think it will get easier. It never really does. Every year I am left missing my dad and wondering what I could have done different to keep him here; to help him.

Every day, 22 Veterans take their lives, and this Friday, 3 years ago, my Dad was one of them.

I’ve been sitting on this post, trying to think of what to say and I am finding the words aren’t coming out the way I want them to. I am still angry, I am still sad, I still blame myself; but I still try to celebrate the good memories. Because of him, I have my love of animals, of gardening, and I can out fish most people I know. Because of him, I have my big fluffy hair and my quick wit. I am grateful that before he passed he knew I was pregnant and that he was going to be a Grandpa.

I am so lucky to have had a great man in my life, even though the past few years were so hard for him, and for all of us.

I can’t say this enough-if you or someone you know is thinking about killing yourself, please reach out and get help. It doesn’t need to end that way. There’s help. There’s so, so much help. One resource, The Suicide Prevention Lifeline is there 24-7, at 800-273-8255. You can also chat online with them or text for support at 838255. There’s also a great resource, located here, to help find Veteran resources.

Here’s to remembering those we loved and lost, on this and every day.

Raina

My big girl

cropped-IMG_941111.jpg

IMG_9787

IMG_9777

IMG_9772

IMG_9769

IMG_9761

IMG_9757

IMG_9719

IMG_9724

IMG_9668

IMG_9670

IMG_9677


My big girl, my sweet, sweet child.

These pictures are already a month old and every day she looks more and more like a big girl, than my little baby. I love her wild, fluffy hair, and her expressive little face. Like me, this kid will not be good at poker. You know how she’s doing with out saying a word.

We adventure every weekend and explore together. She’s a sea of words, and questions, and energy. We snuggle in to watch “Stella and Sam” and we sing at the top of our lungs on drives. She is my favorite road trip pal, and as long as we have snacks and a park nearby, she is more than happy to go anywhere. We play play dough when the weather is too poor to go out, and I love watching her tiny little hands with their soft dimples roll the dough in to various shapes.

On the feeding front, we’re considering her weaned from her g-tube, but will be keeping it in for another few months. She’s growing like a weed; 3 feet or so now and is a bean pole.

She never ceases to amaze me, this wild-child of mine. My heart is full.

Yours in mommaness,
Raina

Day 8: Biscuit Blossoms with The Freshman Cook!

Our last day brings us right up to Mother’s Day weekend! Teri from The Freshman Cook is here to show us how to make Biscuit Blossoms! Please go to her blog site and show her a little blog love: http://www.thefreshmancook.com/. Enjoy!

Mother’s Day is right around the corner, and if you are looking for something sweet and special to serve for breakfast or brunch, Biscuit Blossoms are your answer! They are simple and quick to make, and you might just have most of the ingredients already in your fridge! The blossoms are made from Honey Crescents. I used strawberry yogurt for the filling, topped it with whipped cream, shaved milk chocolate, and a strawberry. See what I mean, simple and quick! Oh, and this is even better~make the biscuits the day before you are serving. Put them in sealed container to keep them fresh. That way on the day you are serving them, you can put them all together while your whipping cream is whipping!

biscuits yogurt brunch breakfast

 Biscuit Blossoms

(printable recipe)

1 can Crescents
2-3 containers Strawberry Yogurt
1/2 cup Whipping Cream2 tablespoons Confectioner’s Sugar
Block of Milk Chocolate

small Strawberry for each blossom

dough sweets crescent dough

Unroll cresents from the package.

Across the bottom, mark a line every 3″.

Use a knife or pizza cutter and cut on the lines to the top,

and across the middle. You should have 8 large squares.

Ignore the lines that were in the dough when you unrolled it.

dough baking sweet treats Mothers Day brunch breakfast

Spray your cupcake pan with pan spray.

Place a square in each circle. Pull the pointed edges

of the dough to the edges of each circle. They won’t all look alike.

Bake according to package directions.

baking dough Mother's Day brunch

As soon as you take the pan from the oven, use

whatever you have to make a circle in the middle of the crust.

There will already be a small one, you are just defining it.

brunch biscuits cooling

Let cool completely.

whipped cream brunch breakfast

Make your whipped cream by pouring cream into bowl and

add confectioners sugar. Start mixing on low until

sugar is combined, then turn on high until cream has whipped.

brunch biscuits yogurt breakfast

While cream is whipping, fill each blossom with yogurt.

brunch biscuits yogurt whipped cream

Add whipped cream on top of yogurt.

You can use a piping bag with a decorating tip,

or just dollop it on top.

milk chocolate shaved chocolate chocolate shavings chocolate curls

Use a vegetable peeler to shave pieces of chocolate.

brunch biscuits Mother's Day strawberries

Sprinkle the chocolate over the top.

Cut a strawberry, so it fans just slightly, and place

it on top against the back on the blossom.

Biscuit Blossoms chocolate strawberries

Enjoy your Biscuit Blossoms!


Day 7: Frisee Salad with Jardons and a Poached Egg

I am so excited for our 7th day brunch recipe!!  Terri over at Our Good Life brings us a tasty Frisee Salad with Jardons and a Poached Egg-YUM!

by Terri Steffes

Prep Time: 5 minutes

Cook Time: 6 minutes

Ingredients (1 salad)

  • 1 T white vinegar
  • 1 egg
  • 2 slices of thick bacon, cut into 1/2″ pieces
  • 1 shallot, finely minced
  • 2 T olive oil
  • 1 T red wine vinegar
  • juice of 1/2 lemon
  • 1 small head of curly endive (frisee) lettuce

Instructions

Wash lettuce, cut from stalk and pat dry.

Fill a skillet with water, bring to a boil, add vinegar and a large pinch of salt. Reduce the heat, stir the water in one direction, crack egg into a cup and slide the egg into the swirling water. Cook until the egg is set, about 3 minutes. Remove the egg carefully with a slotted spoon. Set on a paper towel to dry, slightly.

Cook the bacon until crisp. Remove and drain. Add shallot to bacon grease, add red wine vinegar and cook for 1 minute. Salt and pepper as needed.

Put the lettuce in a large bowl, pour dressing over top and toss. Place a large mound of lettuce on a plate, top with egg and lay slices of bacon around edge of salad. Serve.

Frisee Salad

YUM!!  Now, let’s learn a little about the gal that brought us this amazing recipe!

BobandTerri

Terri is a retired elementary principal who currently serves as an educational consultant for the University of Missouri and the Missouri Department of Elementary and Secondary Education.
During my free time you will find me eating out, cooking at home, shooting some photos, reading, traveling, planning, listing, walking, blogging, crafting and enjoying my home.  My husband and I have been married for 38 years (in June) and we have one married daughter and two adorable dogs, Truman and Wilson.

Day 6: Jen from Not My Grandma’s Kitchen’s Breakfast Pizza!

Hello, hungry readers!  How much fun are you all having with these posts?!  I am so inspired to try so many new things. We’re here on Day 6, and Jen from Not My Grandma’s Kitchen has a tasty breakfast pizza recipe, which is sure to please everyone in your house!  Read on and enjoy!

Hi, I’m Jen from Not My Grandma’s Kitchen. This breakfast pizza is something I have been working on for a while, but continued to put it off because it’s a little more time consuming than most of the meals I like to make. However, it sounded so good. But how was I supposed to figure out pizza with no cheese? This guest blogging opportunity offered me the motivation I needed to make it happen. I made it happen, and it was great!

BreakfastPizzaNMGKFinal

In this recipe, the eggs make a beautiful binder to hold the toppings on, just like cheese would do. It’s flavorful and can be done with whole eggs or scrambled eggs. My toddler loves scrambled eggs, so that’s what I went with.

PizzaCrustNMGK

The key to getting this recipe right is making sure the crusts of the pizza dough extend high enough to keep your eggs in. Add the eggs slowly to be sure they don’t spill over and keep it just under the top. When the eggs are cooking they expand, and they have the potential to drip over in the first part of cooking. I highly recommend cooking on a tray with edges the first time or two, so if the eggs to spill over, they are caught on the tray, and not on the bottom of your oven.

UncookedPizzaNMGK

Serves: 4-6
Time: Including dough, 1 hour.

Whole Wheat Pizza Dough
1 cup warm water (about 110 degrees)
1 packet of active dry yeast for whole grains
1 teaspoons of sugar or honey
2 1/2 cups white whole wheat flour
2 tablespoons oil

  1. Preheat the oven to 425 degrees. Mix the warm water, dry yeast, and sugar/honey until the yeast dissolves. Set aside on t the stovetop for about 10 minute, until the mixture becomes foamy.
  2. In a large bowl, a stand mixer with a dough hook, or a food processor with a dough blade, add the flour, water mixture and the oil. Mix until the ingredients are mixed consistently. The dough should be only slightly sticky. If it seems too wet, you can add a tablespoon extra of flour at a time until it reaches the desired texture. Place in a bowl (I like to lightly grease it with oil), cover it with plastic wrap, and set back on the stove for 15-20 minutes. (If you are making the breakfast pizza with the crust, this is a great time to cut up/cook toppings.)
  3. Once the dough has risen, drop it out onto a floured surface and knead a few times, adding additional flour as needed to prevent sticking. Roll out into a circle, until the dough is about 1/4″ to a 1/2″ thick (depending on how you like it). At this point I transfer the dough to a baking sheet. Fold the edges upwards or roll them inwards to create a thick crust so the eggs won’t run out.
  4. Place the crust in the preheated oven for 10 minutes. It should be just cooked, not browned.

Breakfast Pizza (as shown)

5-6 large eggs
1 bell pepper – color of your choice, cut into small pieces
1 package of bacon, cut up and precooked, or precooked bacon bits
¼ cup of chopped green onions

  1. Crack the eggs and lightly scramble in a bowl. Pour them slowly into the crust, stopping at least ¼” below the top of the crust.
  2. Add the rest of the toppings to the top of the pizza.
  3. Gently place in the oven, on the center rack and cook for 15-20 minutes until the eggs are thoroughly cooked, and the crust is brown.
  4. Let sit for about 5 minutes before cutting, and then enjoy!

Tips:

You can speed up the process with precooked pizza dough and precut bacon bits.
These toppings are just a suggestion, feel free to use what you have in the fridge, or try something different.

YUM! Now that you’re ready to make this, let’s find out a little bit about Jen!

romanczjenny

I’m Jen. I’m an occupational therapist, a mom, and a lover of food. I developed food allergies after having my daughter and wanted to show the world that eating to avoid allergens is not only completely possible, but it’s actually really yummy! I have allergies to barley and dairy, but often include recipes that are egg free and/or gluten free. Being a busy working mom, everything needs to be fast too. I’m a novice gardener, so during my summers off from work I can be found in the garden and in the kitchen. Most of all, I love to laugh!


Day 5: Selvarani from Happy Women’s Book brings us Money Bags!

I am so excited to have Selvarani from Happy Women’s Book join us for Day 5! She is bringing us a super adaptable dish that is great for brunch, and well, any time! The best part about this recipe? You can use the ingredients in different ways, for different meals. How great is that!  Read on for her recipe for Money Bags!

Vegetable Pouch/Money Bags is a healthy dish which is loaded with variety of veggies and it is perfect for brunch.When i saw Raina’s post about Brunch Guest Blog Posts in Food Bloggers Facebook page,immediately i added my name with a thought of this vegetable pouch.Thank You Raina..!


My Little Prince started schooling, so I have to send brunch recipes for a late morning meal. Its a very big challenge to satisfy kids tastebud because if they see one of the ingredients they dislike, they immediately say “No” to the whole dish without tasting it…Every day i ask him for his favorite dishes,veggies & fruits for salads and prepare it, and have it packed up with a little creativity to attract his taste buds. He is a very naughty prince, and I haven’t seen a kid like him before, but I am excited to watch him learn and grow. Kids always know the tricks to get down mom’s anger with their cute smile. This one makes him smile, and I prepare this recipe often!

You can serve this Veg Pouch for kids breakfast / dinner.


Vegetable Pouch / Money Bag Recipe :

That’s it : Outer dough – Inner stuff – Deep Fry

Cooking Time : 30 mins

Makes : 9 

Ingredients :

For Outer Dough (Pouch)”

Wheat Flour / Maida 1 Cup
Salt ¾ tsp
Water ½ Cup
Ghee / oil 2 tsp

*You can use maida for outer layer and

steam/fry it to get Veg Momos.

For Inner Stuff :

Olive oil / any oil 1 tbsp
Garlic 2 pods
Green chili 1
Spring Onion(white,green) 2 tbsp each,strips-9 total
Big Onion 1 small
Cabbage,Carrot,Beans 1½ Cup
Sugar ¼ tsp
Soy sauce ½ tsp
Tomato sauce(optional) ½ tsp
White / Black Pepper ½ tsp
Salt ½ tsp

*You can also use Sambar powder( ½tsp) instead of soy sauce.

*You can also add chicken pieces, cooked noodles for the stuff.

Procedure :

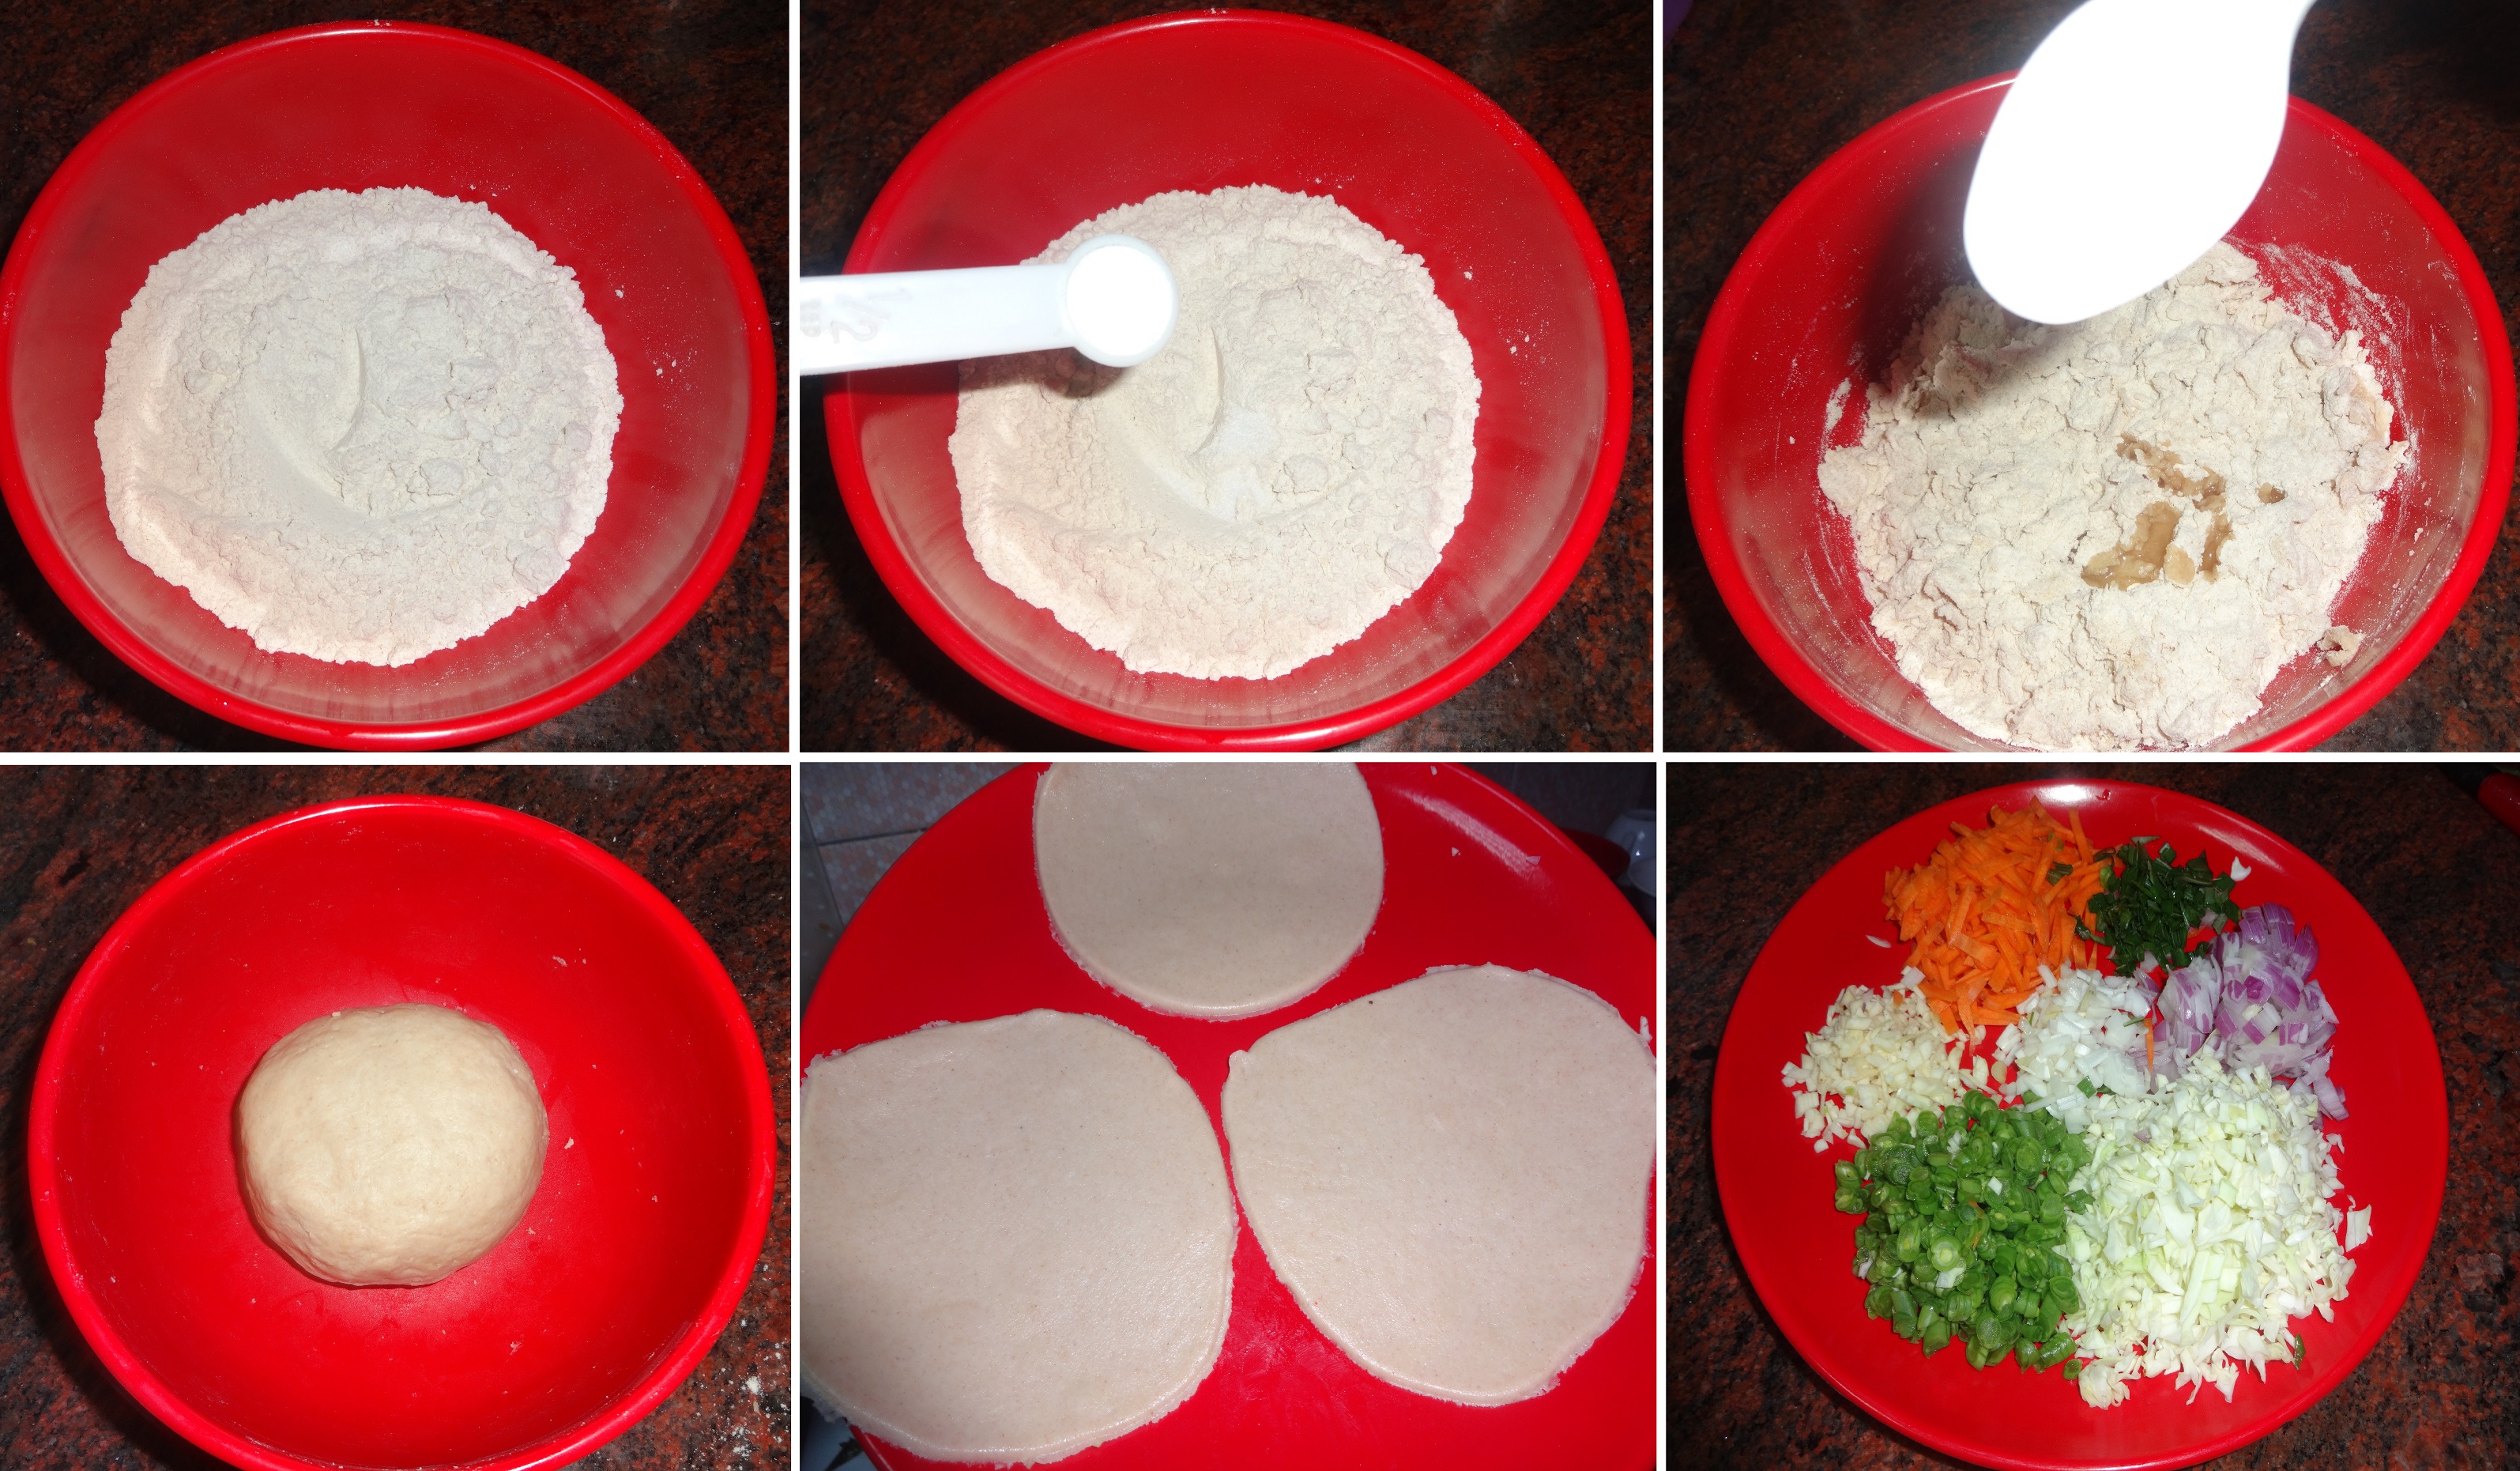
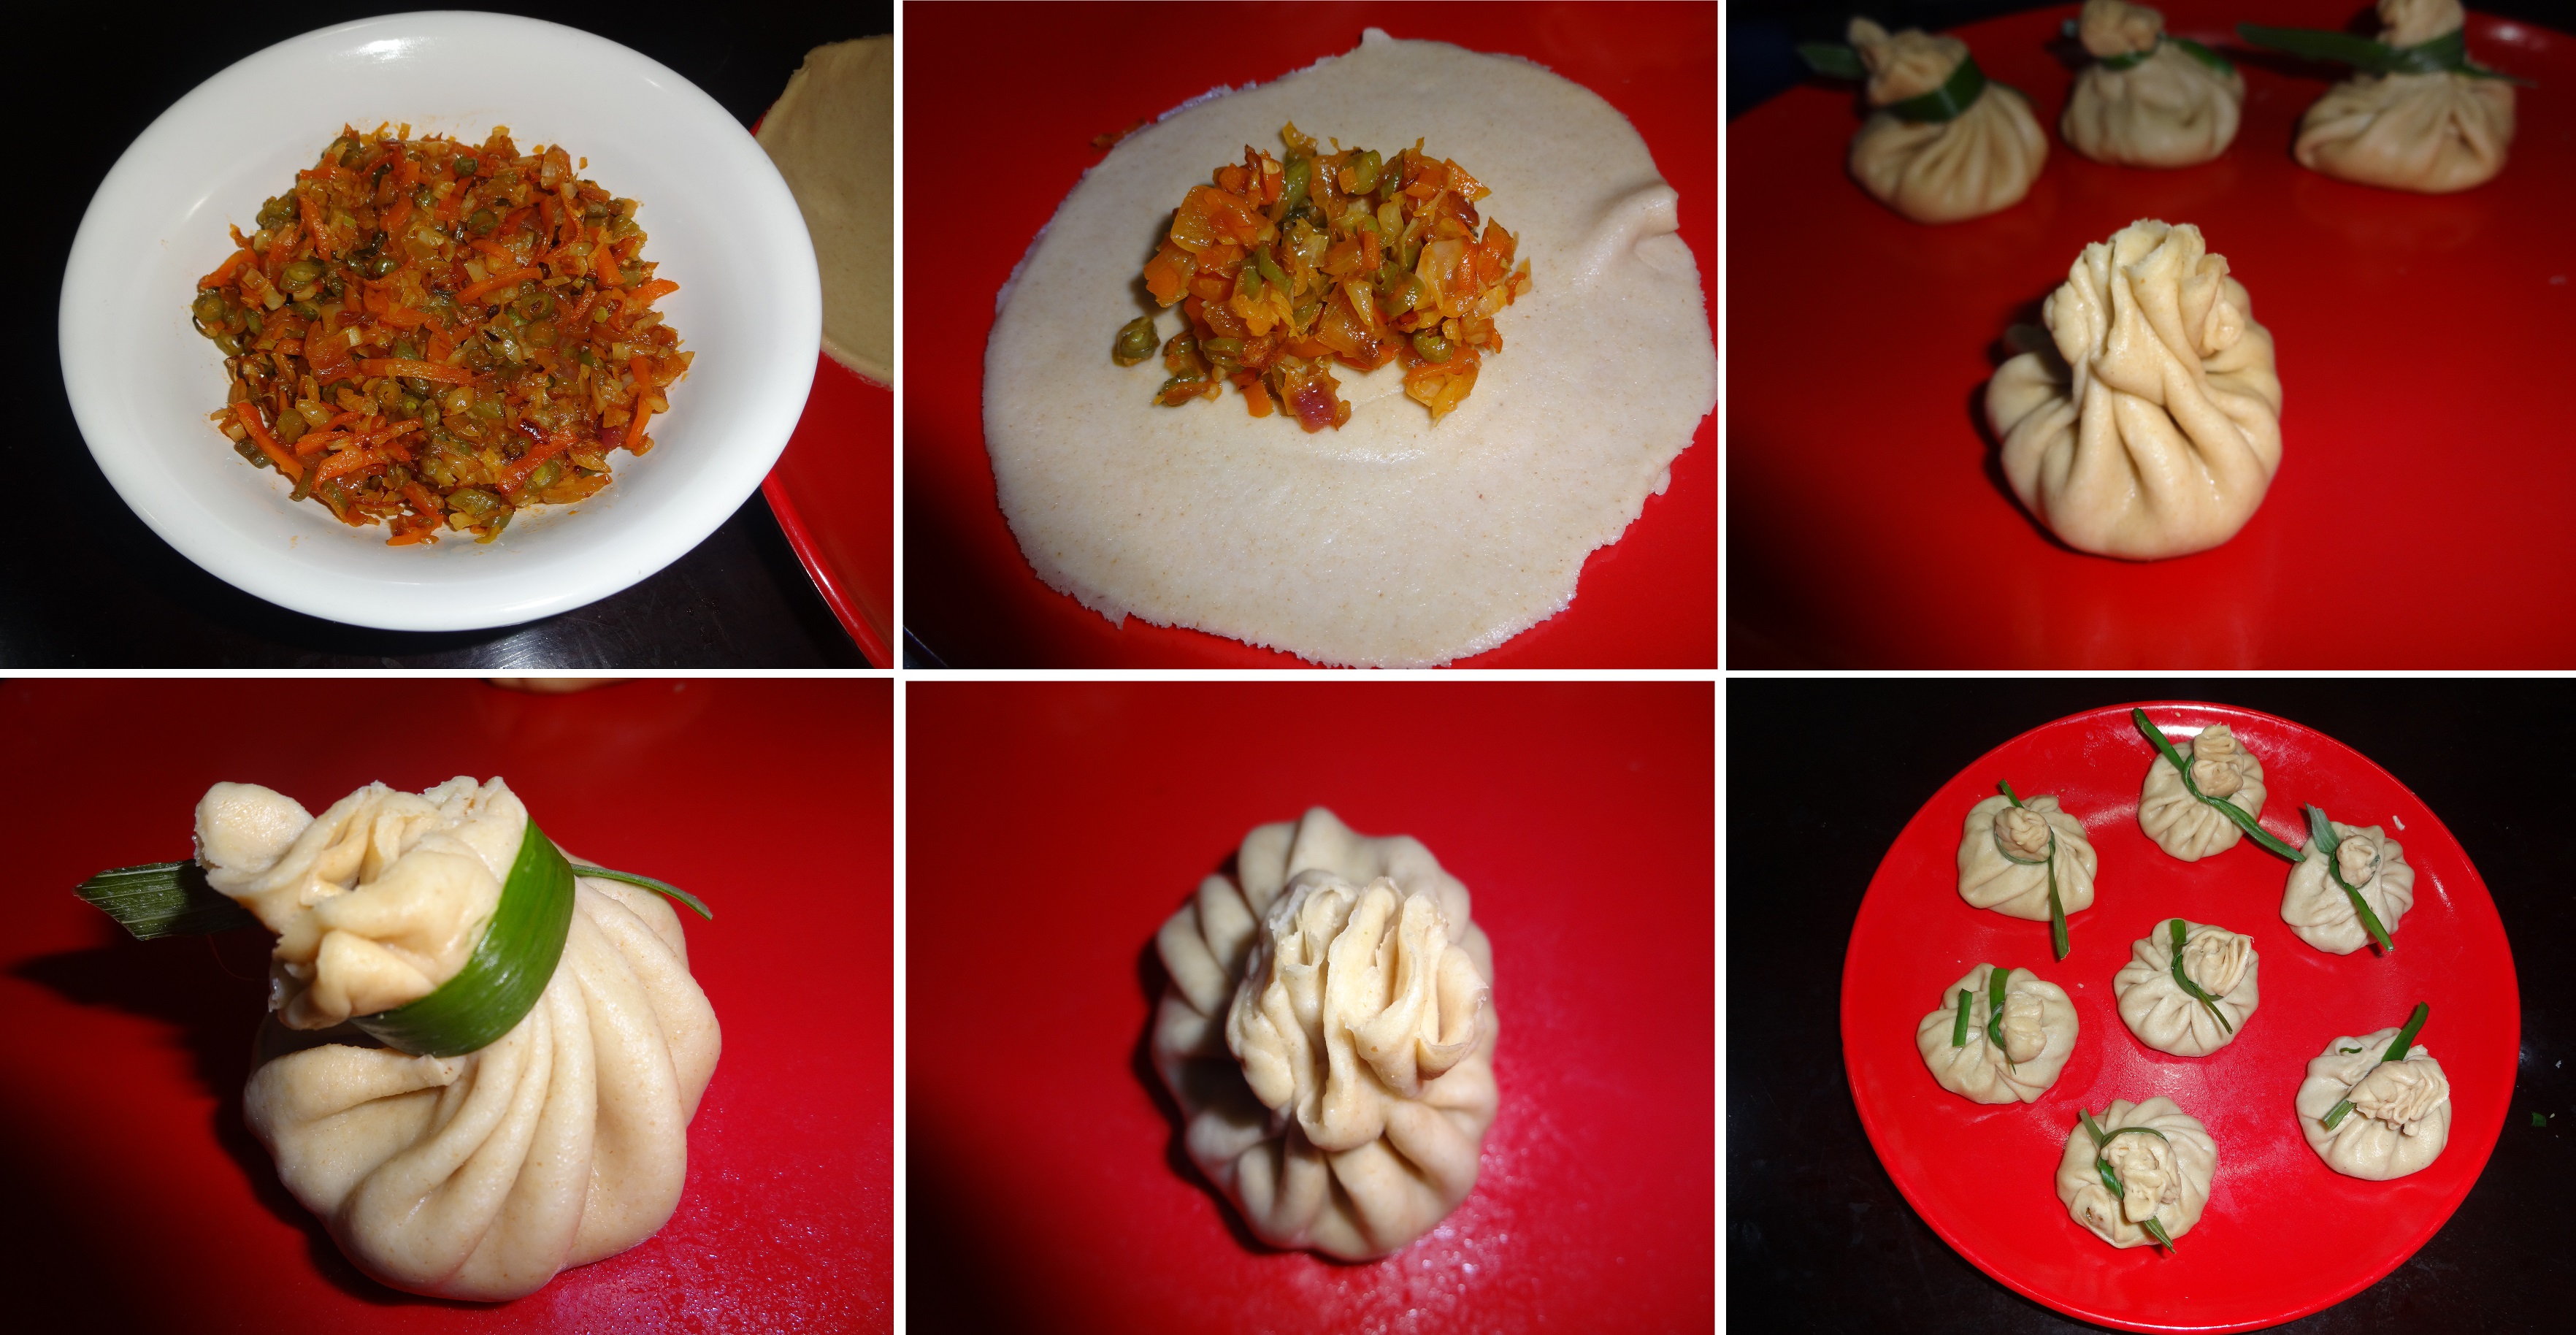
1.In a bowl,add wheat flour,salt,water and knead it with oil to make soft dough like poori dough.Roll it as thin flat round shape as we do for making chappathi, poori. Chop veggies,spring onions (white.green part) and cut some spring onion’s green strips too.Keep aside.


Cook in High flame to retain crunchiness

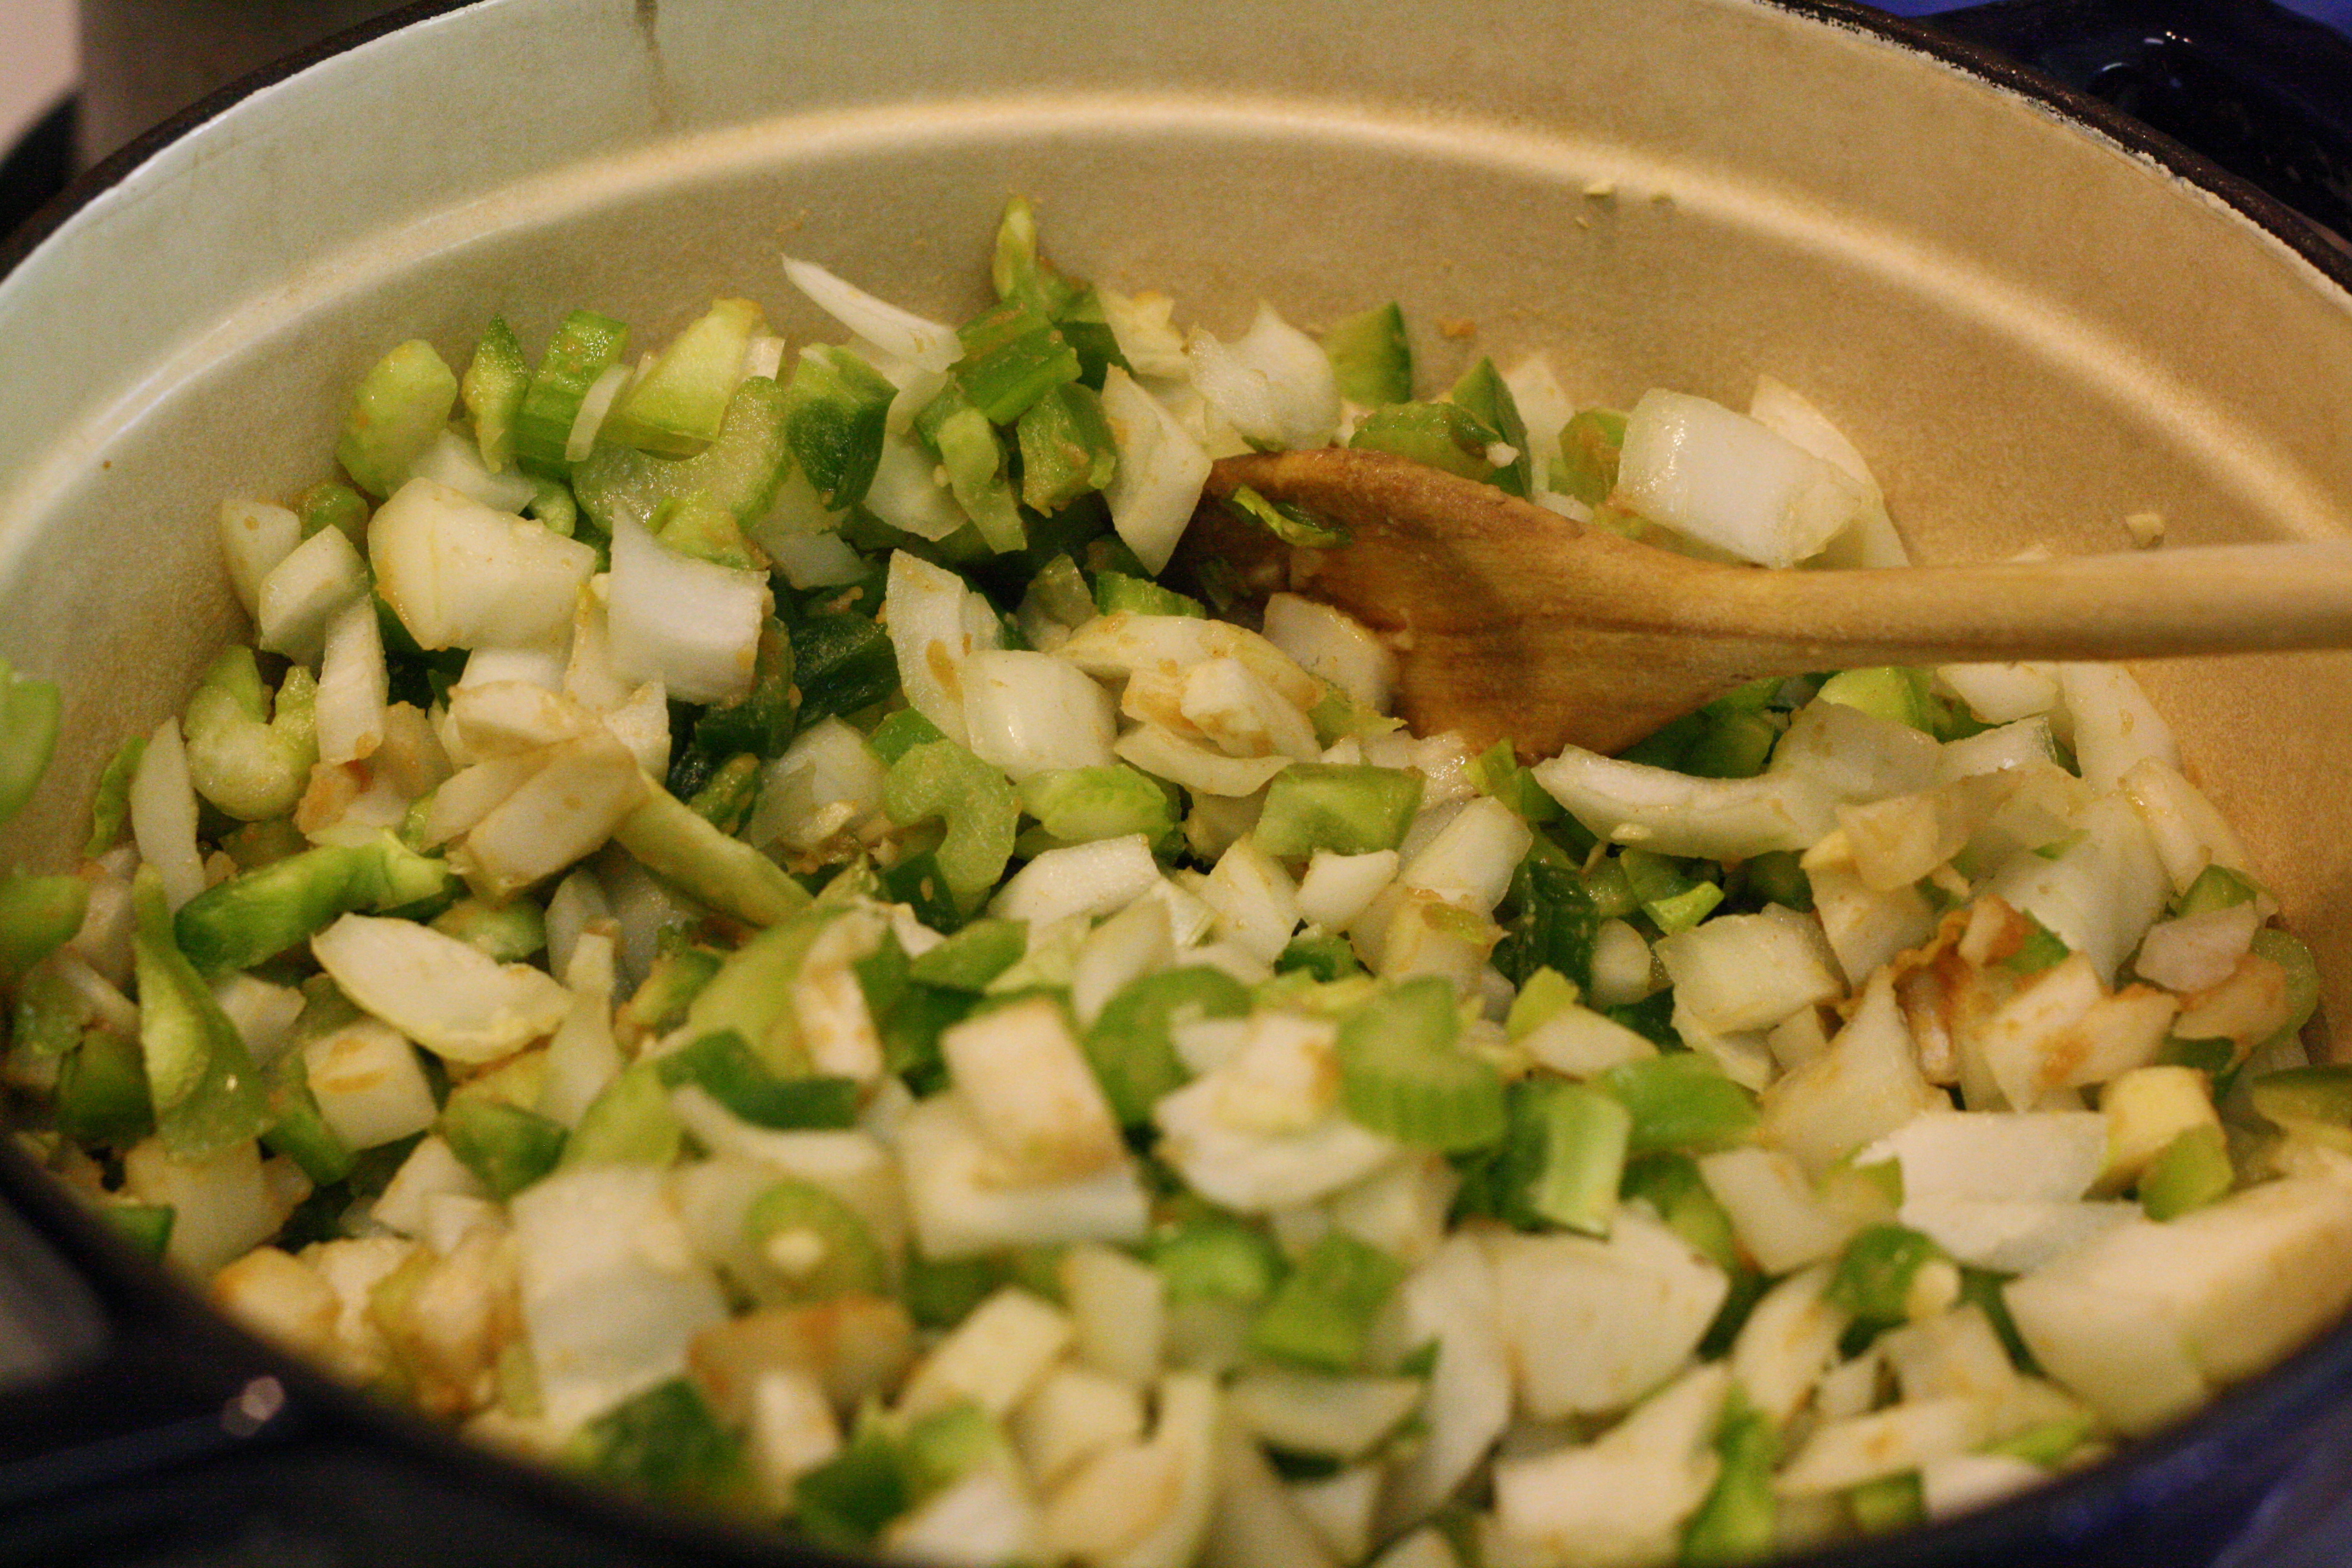
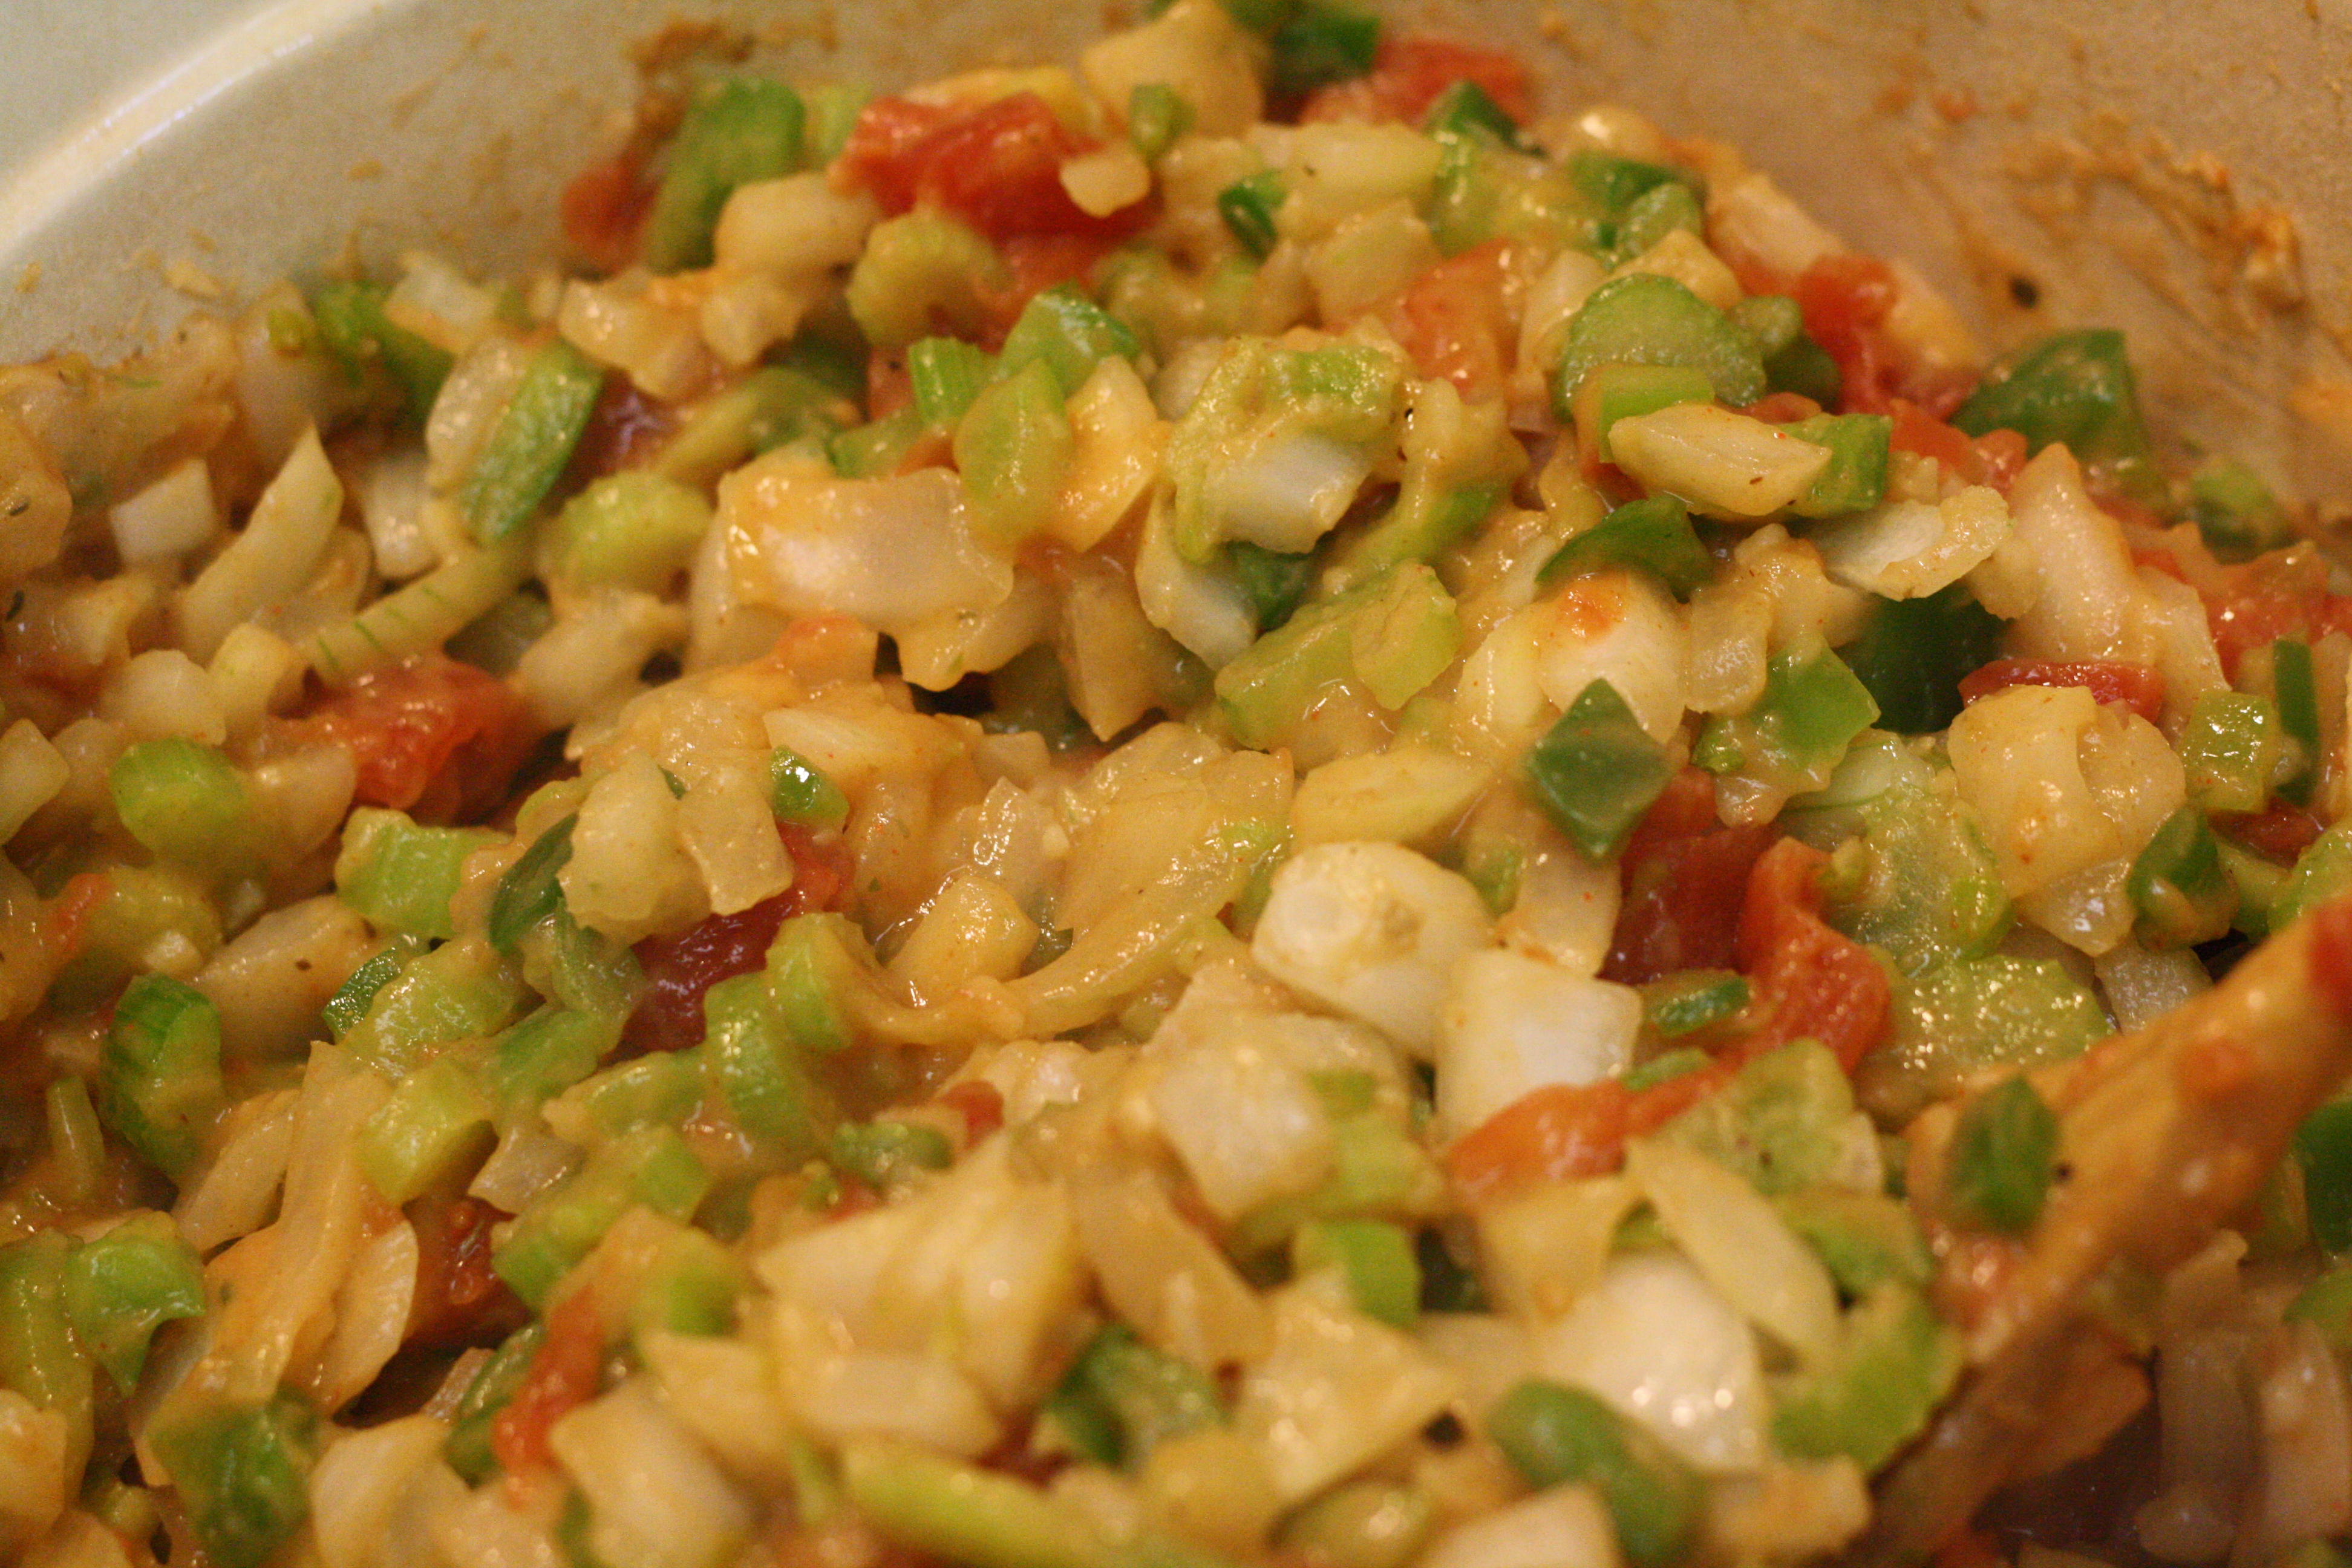
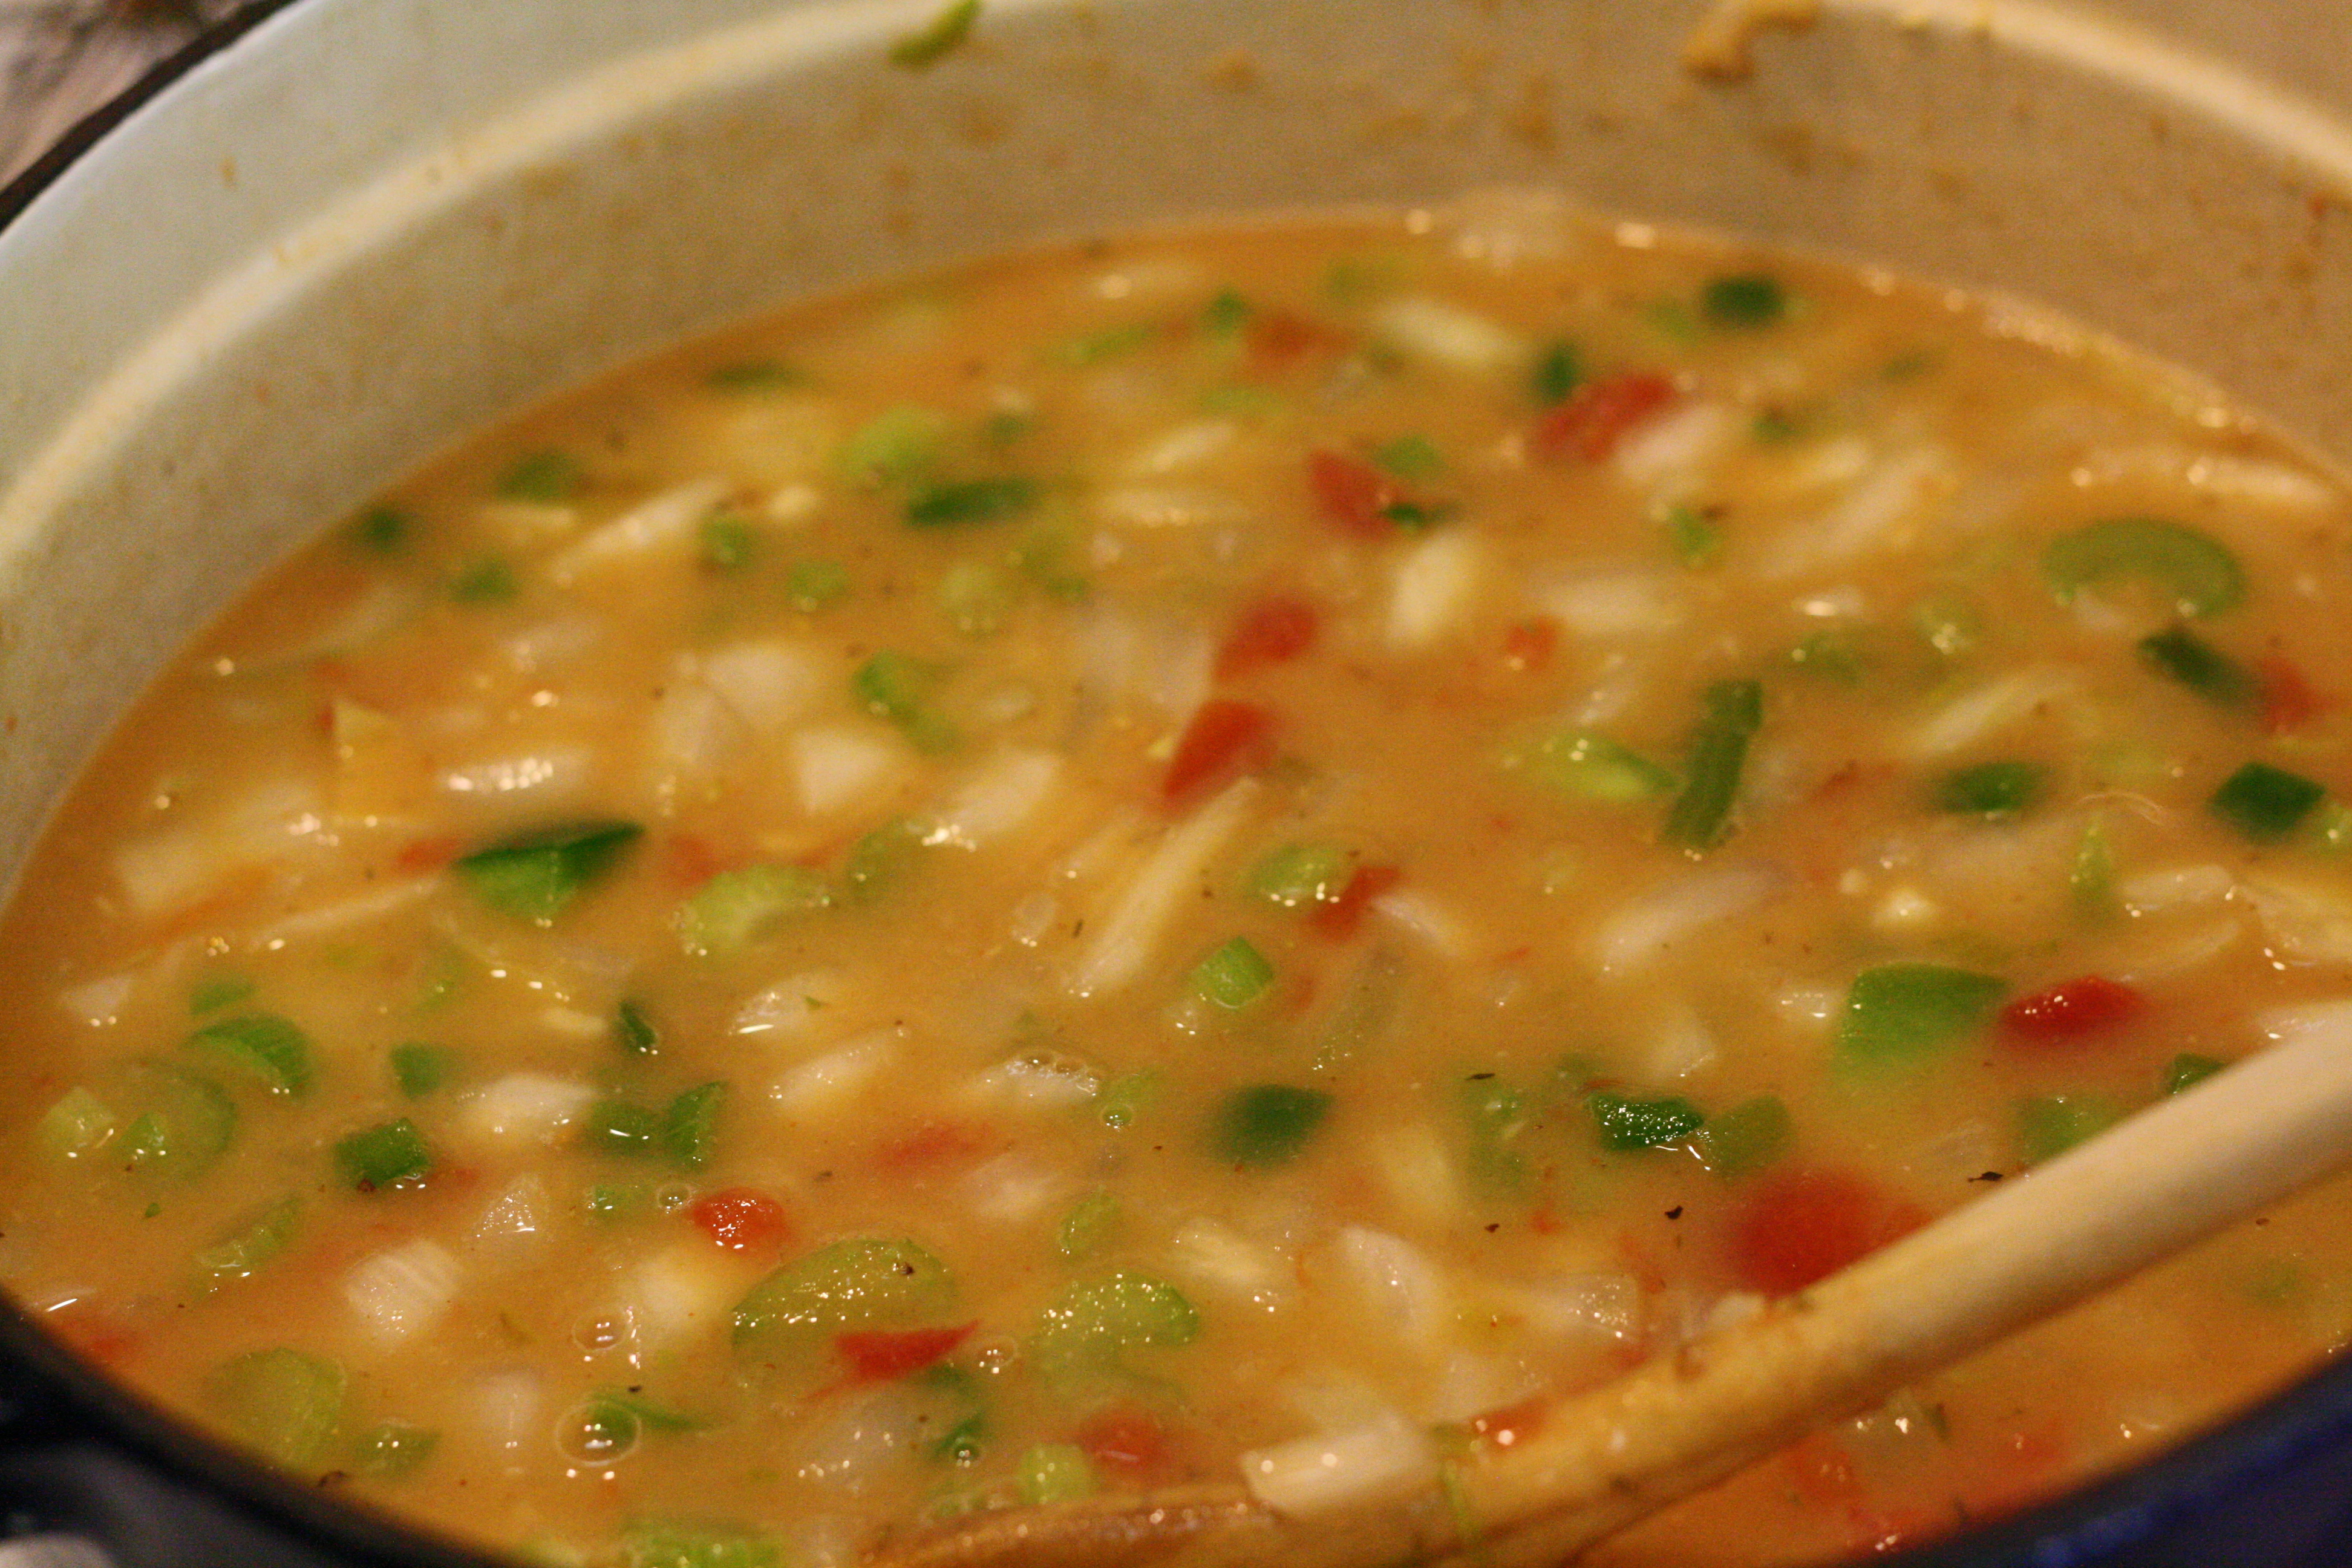
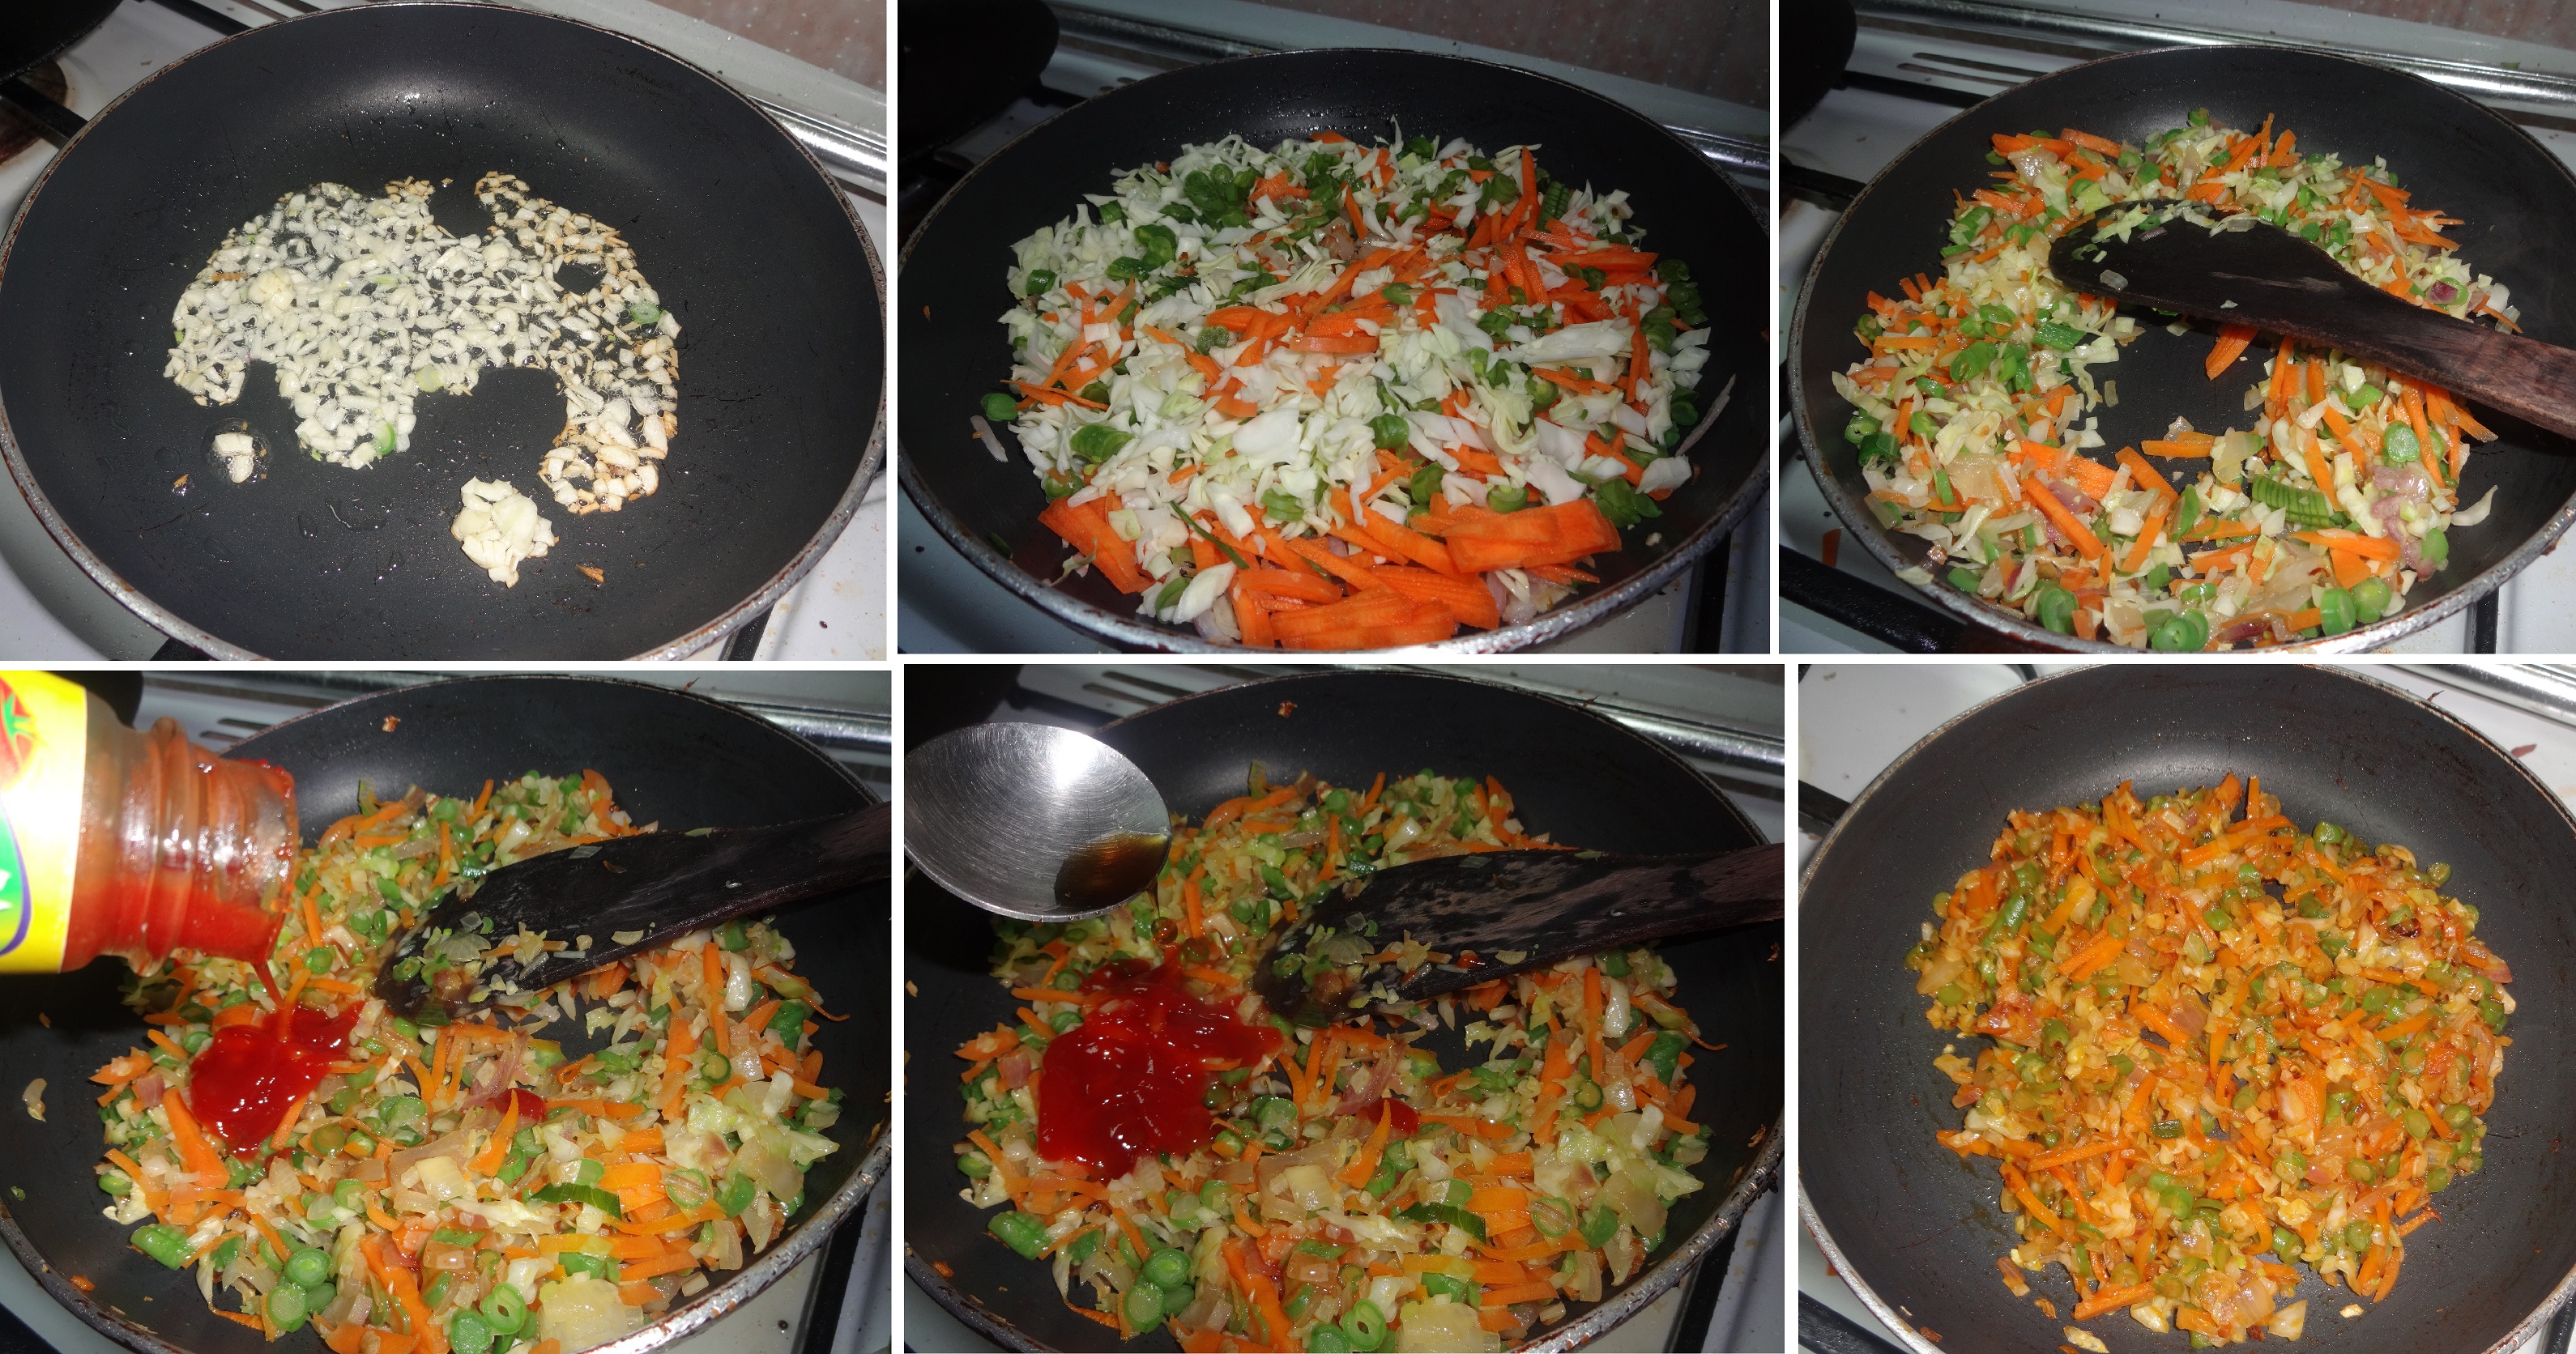
2.In a pan,add oil,garlic,green chili,spring onion(white),fry for a min,add onion,veggies,sugar,soy sauce, fry for 3 mins,add salt and mix well.Sprinkle pepper powder,spring onion(green) and switch off the flame.


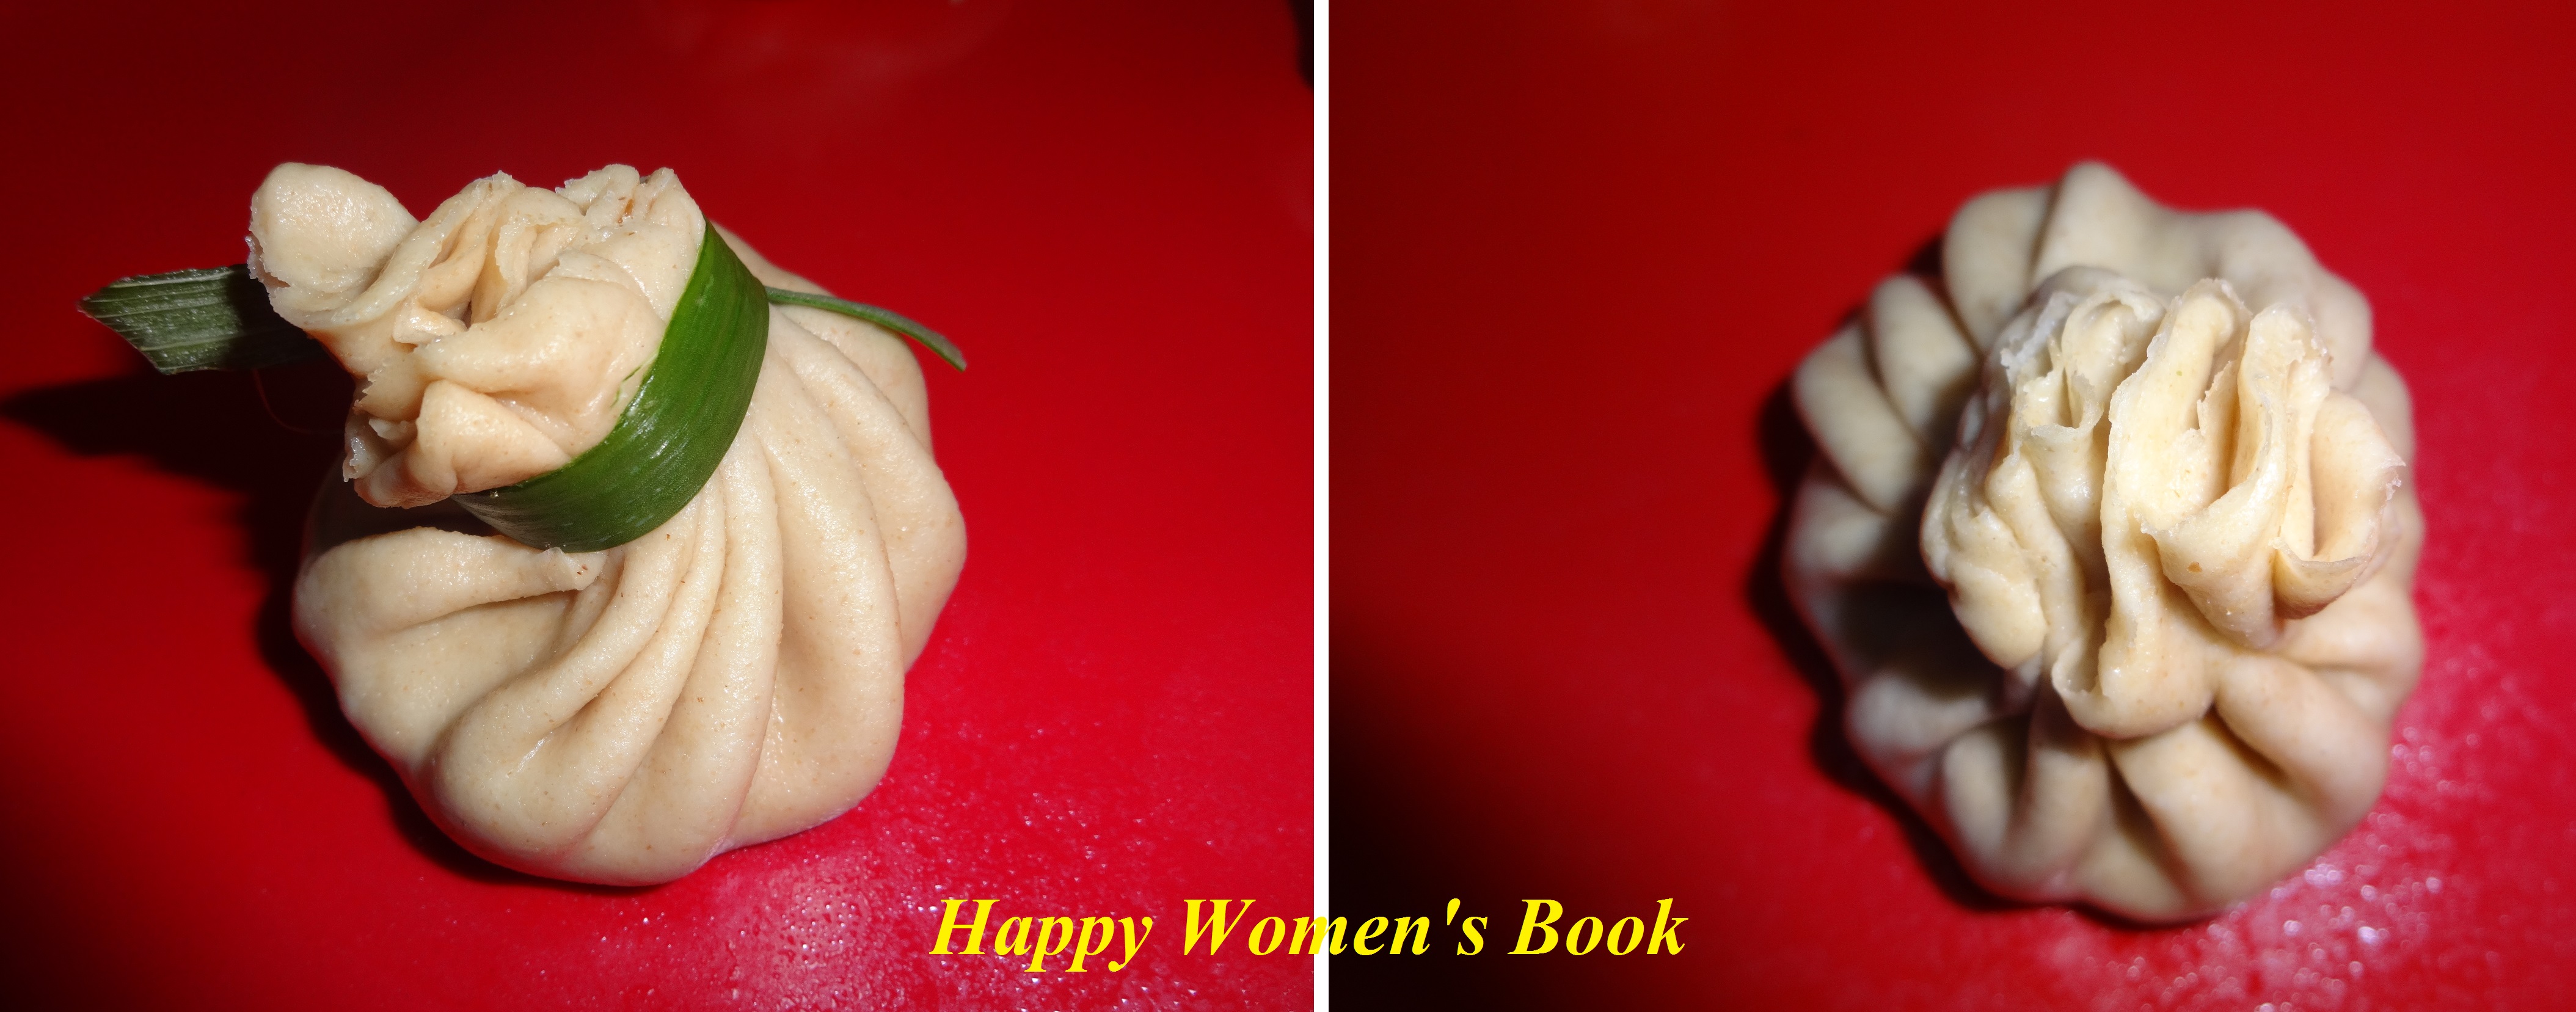
3.Now in a rolled poori ,add 1 tbsp of stuff and join the edges by taking small fleets back to back for making pouches and tie it with spring onion green strips.(Tieing is optional,You can also just press the gathered edges. It’s for kids sake)


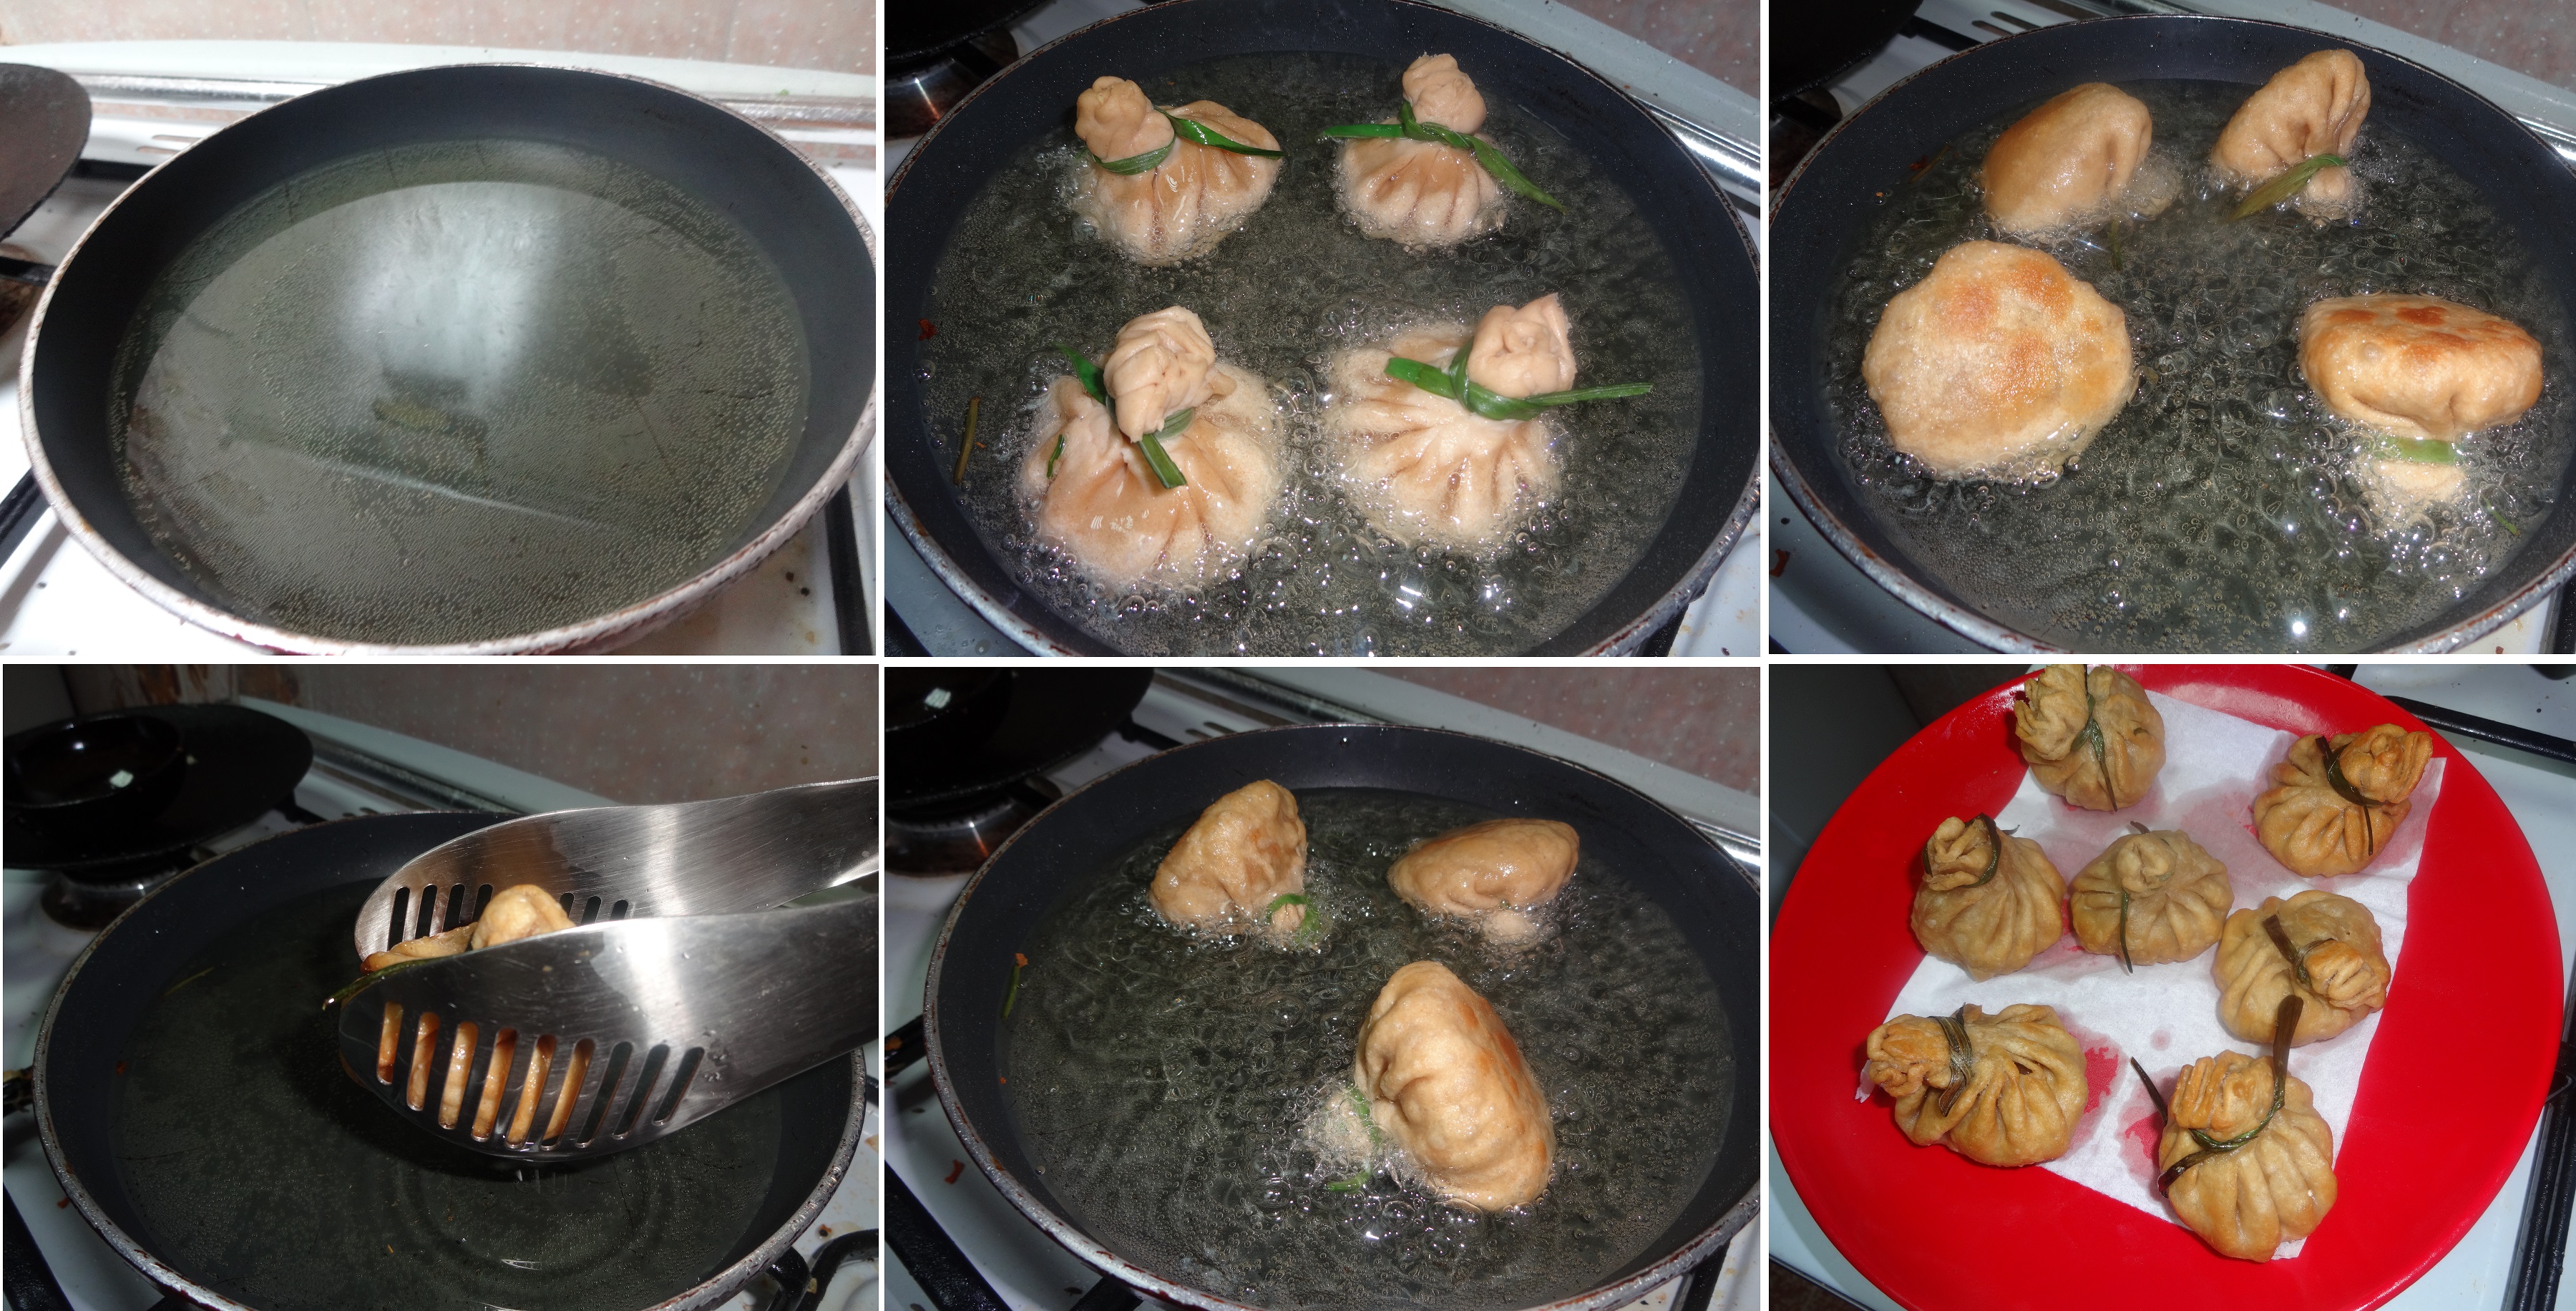
Cook in Medium flame

4.Deep fry the Pouches till browns(light or thick) because stuffing is cooked and we need to outer layer only.


                   Vegetable Pouch/Money Bag is Ready…!

Serve Hot with tomato ketch up,sweet chili sauce,garlic sauce etc.;

Notes :

1.You can use this inner stuff to make fried rice.

2.Use this stuffing as a side dish for chappathi / Roti / Phulka as a spring roll.

3.You can skip soy sauce and use sambar powder to make it as Indian style.

4.You can use this for kids breakfast / dinner too.

5.You can also do this with All purpose flour / Maida and steam or deep fry it to make Veg Momos.


This. Looks. Awesome!

I love how you can make this recipe into so many things!  I am really excited to have had Selvarani on the blog-here’s a little bit about her!


I Am Selvarani Ganesan from southern part of India (Tirunelveli,Tamil Nadu) and residing in the Oman for the past 4 years with my naughty boy(Gautham) and my man Mr.Ganesan. Now the author of Happy Women’s Book blog.  The main Pillar behind my HWB blog is my man, my sissy & friends. My Man is a food lover and most of the recipes i came to know from him.


Day 4: Tania from Hash Tag Eat’s Hawaiian French Toast!

Hi hungry readers!  Can you believe we’re half way through, already!?  Day 4 is as sweet as can be with delicious Hawaiian French Toast with Bananas Foster Topping from Tania at Hash Tag Eat. I am SO excited to try this one. Yum!

Brunch is definitely a favorite.  Here is one of my favorite recipes for French toast.  Hope you enjoy!

 IMG_9168pint

Recipe: Hawaiian French Toast with Bananas Foster Topping

INGREDIENTS

  • 3 eggs
  • 1 cup milk
  • 1/2 cup heavy cream
  • 1 tablespoon pure vanilla extract
  • 1 tablespoon ground cinnamon
  • 1/4 cup brown sugar
  • Pinch of ground nutmeg
  • Loaf of King’s Hawaiian Sweet Round Bread (cut 1 inch slices)
  • 3 tablespoons unsalted butter melted
  • 1/4 cup toasted shredded coconut (optional) – set aside
  • 1/4 cup powdered sugar – set aside


IMG_9092

Topping:

  • 3 bananas sliced diagonally
  • 2 tablespoons unsalted butter
  • 1/2 teaspoon vanilla
  • 1/4 cup brown sugar
  • 1/4 cup maple syrup of your choice (optional)
  • 1/2 teaspoon cinnamon
  • 1 teaspoon rum extract or 1 tablespoon Jack Daniels Tennessee Honey (optional for

grown-ups)


DIRECTIONS

  • Whisk together eggs, milk, whipping cream, vanilla, cinnamon, brown sugar, nutmeg and melted butter in a medium bowl; then place contents in a shallow dish to be used for dipping.
  • Lightly oil or butter pan/skillet in low to medium and lightly oil.
  • Take 2 slices of bread (or as many as you can fit in pan/skillet) and lightly dip each side into the batter then place in the heated pan/skillet. Cook until both sides are golden brown. Repeat until done.
  • Keep in oven until ready to serve.

IMG_9116

IMG_9133

Topping

  • Melt butter in a skillet on low heat
  • Add maple syrup (optional), brown sugar, vanilla, cinnamon and rum extract or Jack Daniels then mix well
  • Add sliced bananas, cook until slightly tender; set aside to cool

Once cool, spoon over and enjoy!

IMG_9145

IMG_9161


A little bit about Tania:

tania arceo_sm

Hi! I’m Tania.

 Born and raised on the island of Guam, and living in the Pacific Northwest. A self-taught photographer, food fanatic, avid food photographer, and blogger of HashTagEat.com.

 When I’m not busy working, you will find me hanging out with family and my furbaby Koa (chocolate Labrador), thinking about what I should cook for dinner and most likely planning my next food adventure in Seattle.

 You can find me on instagram @ohsnaps documenting my food adventures with my trusty iPhone and then some.  Blog: www.hashtageat.com || Portfolio: www.taniarceo.com

Day 3: Spinach and Cheese Strata from Miss Menagerie!

Day 3 is an amazing recipe from Sara over at www.missmenagerie.comWho doesn’t love a something easy to put together, but has the look of prepping for hours?  Melting cheese and spinach, all put together lovingly? Count me in!

I love entertaining, but I’m one of those people who can’t carry on a conversation (or even feign listening to a one-sided conversation) while preparing anything from a recipe. I also love having house  ​guests, but usually don’t love getting out of bed much before they do. You know what else I love? People thinking I’m fancy. Now, I want you to imagine a Venn diagram of those things. Smack dab in the middle is this beautiful make-ahead spinach and Gruyere strata.

strata3

Beyond being delicious–whether you go whole hog with the full amount of cheese, or dial down the indulgence–this baby makes the morning easier. If you’ve visited us in Seattle, chances are good that I served you this. The night before, I spend half an hour in the kitchen, chopping and layering ingredients, and the next morning I pop this in the oven while the house wakes up. You come to the kitchen for coffee and laugh at my unnatural leopard pajama pants, but you back off when you catch the smell wafting from the oven, and because my mom gave me those pants.


It starts just by layering sautéed spinach and onions with bread and cheese.

strata2

This part is a lot of fun: Mix up a custard with eggs, milk, and a little mustard. Pour it over the strata, soaking each chunky bread cube.
strata1
Wrap your beautiful strata up in a Saran Wrap blanket, tell it goodnight, and tuck it in…(in the fridge).

strata4

One note about the size of this recipe: It’s HUGE. I usually make only half the recipe (using five eggs) unless we have a house full of hungry people.

strata5
Spinach and Cheese Strata
Adapted from Gourmet | Serves 6 to 8

10 ounces spinach, roughly chopped
1 large onion, finely chopped (about 1 1/2 cups)
3 tablespoons unsalted butter
1 teaspoon salt (this will be halved and added in two separate steps)
1/2 teaspoon black pepper (likewise)
1/4 teaspoon freshly grated nutmeg
8 cups cubed French or Italian bread in 1-inch cubes (1/2 lb), preferably a day old, or dried in the oven
6 ounces coarsely grated Gruyere (2 cups) or Fontina
2 ounces finely grated Parmesan (1 cup)
2 3/4 cups milk
9 large eggs
2 tablespoons Dijon mustard

In a large, heavy skillet over medium heat, melt the butter. Add the onion and sauté until soft, about 5 minutes. Add 1/2 teaspoon salt, 1/4 teaspoon pepper, and all of the nutmeg and continue cooking for one minute. Stir in spinach and cook until thoroughly wilted. (You may have to gradually add the spinach as what’s in the pan cooks down to fit it all in.) Remove from the heat and set aside.

Spread one third of the bread cubes in a well-buttered 3-quart ceramic or glass baking dish. Top the bread with one-third of spinach mixture, and one-third of each cheese. Repeat layering twice with remaining bread, spinach and cheese. (You don’t have to be very neat with the layering. It won’t be evenly spread, but the laws of randomness benefit you here: Just sprinkle the ingredients about and every bite should get a proportionate amount of each of the ingredients.)

Whisk the eggs, milk, mustard, and remaining 1/2 teaspoon salt and 1/4 teaspoon pepper together in a large bowl (one that has a spout is especially handy here) and pour evenly over the strata. Cover with plastic wrap, pressing down gently, and chill strata for at least 8 hours or up to a day.

After chilling, let it stand at room temperature for 30 minutes or so while the oven preheats to 350°F. Bake the strata, uncovered, in middle of oven until puffed, golden brown, and cooked through, 45 to 55 minutes. If you have an instant-read thermometer (shout-out to my Thermapen!), make sure the inside of the strata is 160°F. Let stand 5 minutes before serving, then sit back in your leopard pants and enjoy your day.​


A little note on Sara:

IMG_9590

A transplanted Appalachian girl who loves pretty things, sugar, and most anything with goat cheese. I blog mostly about Southern cakes and vegetarian food.


Day 2: Nikki and Steve’s Sweet Corn Quiche with Shrimp Creole Sauce

Years ago, I had an awesome neighbor that definitely made the block a better place! We became much closer after she moved away and have kept in touch through the years, sharing wisdom around kids, cooking, and essential oils. We both share a love of farm critters and homesteading. You may remember Nikki from a post a while back, where she made some amazingly easy bread! This recipe is no different-a great collaboration between herself and a peer, Steve! Thank you both for an amazing Sweet Corn Quiche & Shrimp Creole Sauce!!

Hello there from Elizabethtown Kentucky!! I am, again, honored to be asked by my sweet friend to contribute to her awesome blog. A lot has happened since my last contribution. While I no longer blog myself, I have been connected with an awesome little place called the “Java Joint” cafe, where I am able to grow and learn through culinary experiences. Its owner, Steve Breen, and I have become great friends and have been concocting brunch recipes over the past couple months now. This recipe that I’m going to share with you today, comes from my very talented friend and has become quickly a crowd favorite down and the cafe!

Sweet Corn Quiche with Shrimp Creole Sauce

1intro

First part: Make your Quiche!

pic 2

You will need:

* 10″ spring form pan
* Pie dough (you can use store bought or homemade)
* 12 eggs
* 1/2 cup heavy cream
* 1/2 cup cottage cheese
* 1 can cream corn
* 1 cup frozen corn
* 1 cup shredded cheese

1.)Spray your pan with cooking spray and line your spring form pan with your dough.

Pic 3

2.) Whisk all of your ingredients together and pour into your pan.

pic 4

pic 5

3.) Bake your quiche at 350 for approximately 1 hr and 15 minutes or until not longer loose in the center.

pic 6

Part 2: While baking make your sauce!

pic 7

You will need:

* 6 tablespoons unsalted butter

* 1/2 cup all-purpose flour

* 4 cups chopped onion

* 2 cups chopped green bell peppers

* 2 cups chopped celery

* 2 tablespoons minced garlic

* 1 (14.5 oz) can diced tomatoes

* 2 bay leaves

* 1/2 tsp cayenne pepper

* 2 tablespoons creole seasoning

* 1 qt shrimp or chicken stock

* 3 lbs shrimp (peeled, deveined, tail off) (if frozen, let thaw a bit)

1.) Make a roux over medium heat, constantly stirring till it’s the color of peanut butter.

pic 8

2.) Add the onions, peppers, celery, and garlic to the roux, stirring and allowing to cook for about 10 more minutes.

pic 9

pic 10

3.) Add the tomatoes, bay leaves, cayenne and 1 tablespoon of creole seasoning. Cook for 2-3 more minutes and then whisk in the stock.

pic 11

4.) Bring mixture to a boil and reduce heat to simmer for 45 minutes. Remove bay leaves and take a stick blender to pulse until you have a sauce like consistency. Season shrimp with the other tablespoon of creole seasoning and toss in sauce. Cook till done.

-Now-

Cut you out a nice big slice of your BEAUTIFUL Quiche and drape that scrumptious sauce right over! Enjoy!!

pic 12


You totally want this, right?? I know what I am making soon. Thank you again, Nikki! Enjoy dear readers!
Raina

Day 1: The BEST Eggs Benedict with Power Couple Life!

Oh man you guys. We are kicking Brunch Week off with a BANG!  Tiana from Power Couple Life is here to get us started with the BEST Eggs Benedict. After you check out this awesome recipe, please go check out their blog: http://powercouplelife.com/

Enjoy!


eggs
We are Eggs Benedict obsessed.  The endless search of the perfect runny yolks and fully cooked whites is what my Sundays are made of.  Traveling the world has given us the chance to try them in many places, but nowhere is quite like our very own kitchen. 
Restaurants make this dish look like a work of art, but you don’t need to be a trained chef to whip this perfect brunch dish up. 
What is Eggs Benedict? Traditionally, a poached egg, slice of ham, on a toasted English muffin, covered in Hollandaise Sauce.  Ours is a bit different. Why? Bacon. 
What you’ll need:
Hollandaise Sauce
4 egg yolks
1 tablespoon freshly squeezed lemon juice
1/2 cup unsalted butter, melted (1 stick)
Pinch cayenne
Pinch salt

Eggs Benedict
4 slices Canadian bacon + 4 slices of cooked, crispy bacon
4 English muffins, split
1 teaspoons white vinegar
4 eggs
Salt and pepper, to taste
Hollandaise sauce, recipe above
Fresh chives, for garnish
Yield: 2 servings
Instructions:
In a bowl, whisk the egg yolks and lemon juice together until the mixture is thickened and doubled in volume. Place the bowl over a saucepan containing barely simmering water (or use a double boiler,) the water should not touch the bottom of the bowl. Continue to whisk rapidly. Be careful not to let the eggs get too hot or they will scramble.
Tip: If you over cook, add a drop of milk to the eggs to save them.
Slowly pour in the melted butter and continue to whisk until the sauce is thickened and doubled in volume. Remove from heat, whisk in cayenne and salt. Cover and place in a warm spot until ready to use for the Eggs Benedict. If the sauce gets too thick, whisk in a few drops of warm water before serving. 
Tip: Consistency should be similar pancake batter. Brown the Canadian bacon in a skillet and toast the English muffins.Fill a 10-inch nonstick skillet half full of water. Add white vinegar to the cooking water. This will make the egg white cook faster so it does not spread. Bring to a slow boil. Gently break each of the eggs into the water taking care not to break the yolk.  Reduce the heat to a gentle simmer. Cook 3 1/2 minutes until the egg white is solid white and yolk remains soft. Remove with a slotted spoon, allowing the egg to drain.

To assemble: Lay a slice of Canadian bacon on top of each muffin half. Break or cut your bacon into halves. Place 2 halves on top of the Canadian Bacon.  the bacon slices with a poached egg. Season with salt and pepper. Spoon hollandaise sauce over the eggs. Garnish with green onions.
Tip: Hollandaise Sauce does not reheat well. Make only what you will eat right away.
Enjoy your perfect Eggs Benedict, and let us know how they turned out!