Fermented Garlic in Honey
There are few foods that I love more than those that are sweet, tangy and a little bit funky – fermentations fit that bill! You give me any fermented food and chances are I am eating it straight out of the container with a fork. My fermented garlic in honey is an easy to make ferment, requiring very little prep time, very little ferment time and has a ton of pay off.
The result is garlic that is sweeter, more mellow and less sharp, softened by time and patience, while the honey is thinner, pungent and begging to be eaten. I hear you, hesitant and wondering, what the heck are you going to do with a jar of tasty, funky garlic and tangy, sweet honey? Drizzle the honey on soba noodles with green onions, slice up the garlic for your stir-fry, or add to beef stew – anywhere you need a subtle hit of flavor that’s unexpected. Even better, take a spoonful of the honey at the sign of a sore throat. Ready to give it a try?
Ingredients:
10-15 heads of garlic, cloves peeled – I don’t recommend using pre-peeled garlic.
16 ounces of honey
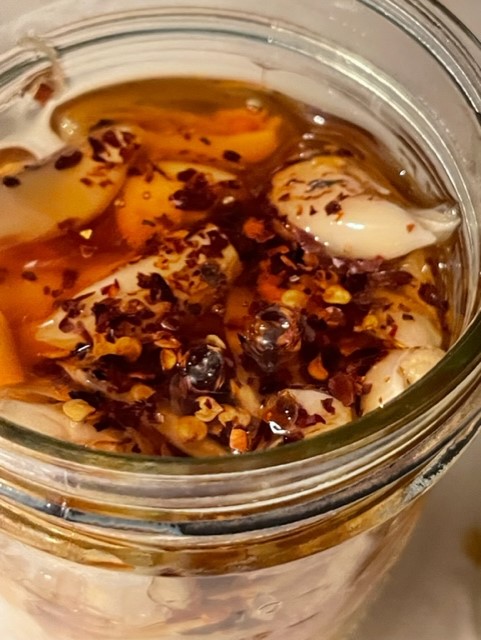
1 tablespoon of chili pepper flakes (optional)
1 pint mason jar, sterilized (see note below)
Note: To sanitize your jar, wash your jar with hot soapy water and boil your jar for 5 mins, washing the lid and ring in as hot and soapy water as you can handle.
Preparation:
If you haven’t peeled your garlic already, go ahead and do that. I like to take the flat part of the knife blade and press the cloves until they crush, and the peel comes loose.
Next, smash your garlic, so it’s flat and splits up, you can also run a knife through it into chunks. I found that smashing my garlic to peel and giving it another smash broke them up enough for me. You’re looking for surface area, and if you want to slice or chop the garlic down even more, you’re welcome to. I am all about easy!
Next, fill your sanitized jar with the smashed garlic cloves, leaving about 1.5 inches from the top. If you want to add chili pepper flakes, now is the time. Give everything a good tap, or gently press down with clean hands, to make sure everything is settled and to remove any extra space.
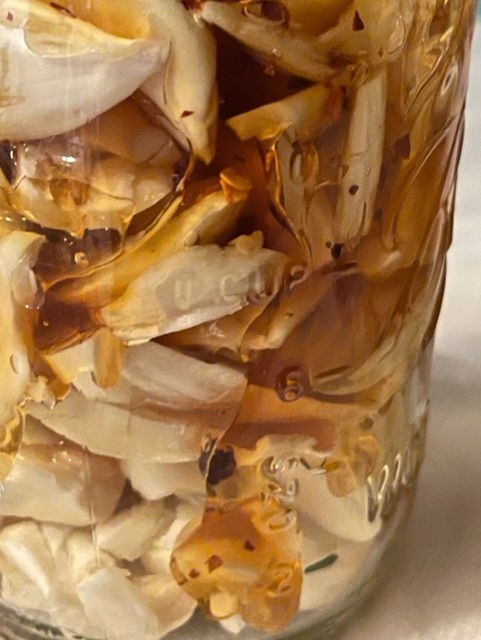
Next, cover with honey. A heads up, this part takes a good amount of time as you let the honey fill every nook and cranny and sink to the bottom of your jar, which means pouring and waiting. This may be a good time to grab a drink or watch a show and keep coming back to it! When your honey completely covers your garlic, and no additional bubbles are popping up, add just a little more honey – you want it to be about an 3/4 inch from the top. Wipe the lid of the jar with a damp paper towel and close your jar. Place the jars on a plate or in a glass dish to catch any honey that escapes or from when you burb it! Yep, you’ll burp those jars like a tiny, well-fed baby my friend.
Why and how do you burp your jars?? As your garlic ferments and starts to break down, it will product carbon dioxide, so burping, or opening the jar to let that out is needed. I’ll warn you now, it’ll be a little stinky, but it’s all part of the delicious process! You’ll do this every day or two for 4-6 weeks, but you can let it go longer if you like. When you’re happy with the taste and texture, you can keep it in your fridge for up to a year.
A couple of notes – you may see your garlic turn blue. This is perfectly safe and a common occurrence! It’s a pH change and your ferment is still safe. While honey is a great fermenting tool and botulism is low risk, you should keep an eye out for mold, which can be the result of not using a clean jar, or not handling with clean hands or utensils when burping or tasting your ferment.
I really hope you try this and enjoy it! Please let me know what you think!
Yours in tasty treats,
Raina


